 Rebuilding Nikon SB-104 Battery Packs
Chuck
Tribolettriblet@garlic.com
http://chucktribolet.smugmug.com/
http://www.almaden.ibm.com/cs/people/triblet/
Notice: This page tells how I have replaced 1600 mAH NiCd cells with 3800 mAH NiMH cells. It's worked for me, but if you do it, it's entirely at your own risk. Some potential problems are:
- The Nikon charger doesn't detect that the cells are fully charged and continues to charge them, ruining the cells, melting down the battery pack or charger, or, worst case, causing a fire.
- The resulting packs have a very short recycle time. If you take lots of pictures in a short period of time, the strobe may overheat internally.
- They are getting tired and new replacements are hard to find.
- Most were made in 1993 and will have been sitting on the shelf since. There appears to have been one small batch in about 2003.
- The cells are 1600 mAH sub-C cells, which were pretty much state of the art then, but have been left in the dust by improvements in battery technology. 3800 mAH NiMH cells are available in the same size today.
- They are expensive: $130 at B&H.
There's an old recipe for rabbit stew where the first step is "catch a rabbit". Well, first we have to get the new cells. I ordered Intellect IB3800 cells from http://www.batterystore.com for $38.70 a pack. Note that Intellect also makes a 4200 mAH cell, but they are slightly larger, I wasn't sure they'd fit, and the old Nikon 1600 mAH cell were adequate anyway. I chose the Intellect cells because they have a low internal resistance, which yields a slightly faster recycle time. The battery store will make up the pack for you for $4.00 -- do this, you really don't want to be soldering on to the batteries themselves. I didn't have them set up the packs for thermal fuse. I'll attack that problem the next time I order cells. Note: do not attempt to solder the thermal fuse on -- it willl get hot enough to blow the fuse.
Update: 06/15/2012: The Intellect cells are no longer available, but Elite has high-rate sub-C cells in 4000 and 5000 mAH. I rebuilt four packs in 2011 using the Elite 4000 cells. I'd probably try the Elite 5000 next time around. http://www.batterystore.com has the Elite 4000 and 5000 cells. Also, I've stopped putting the thermal fuse in, it's just too hard to not blow them with the soldering iron. I have batterystore.com make up packs of six cells.
And a note for all you SB-104 users: Check them with a flashmeter. Of five "functional" SB-104s, I found
that three were way off in 1/4 and 1/16 power. Some were high, some were low. 1/4 and 1/16 can be tuned with variable resistors inside the flash. I have the factory service manual, and a dead SB-104 I'm willing to dig into. If it works, I'll post a web page. No guarantees as to when though, because I still have two good ones.
Update: 06/23/2012. Phil (I don't his last name) came up wth an improvement on my razor saw. He clamped a box cutter handle (aka utility knife) to the work bench and used that. No saw kerf at all (not that a razor saw leaves much of a kerf) and no sawdust. I think I'd take it a step further and use just a box cutter blade, with one screw through the hole in the blade and another behind it to keep it from moving. I'd let just 1/8" f the blade protrude past the block of wood.
Phil also pointed out that the top and bottom of the plastic part are secured to the top and bottom of the batteries with double-sided foam tape (aka telephone tape) and it can take a bit of force to separate them.
 The
first problem is to open up the battery pack. The first time
I
did it I just used a razor saw (Proedge #01370, 30 teeth per
inch,
1.5" deep, 5" long, $2.79 on sale at the local hobby shop) and, while
it worked, it was tedious and the results weren't as clean as I'd like.
So I built a fixture to hold the razor saw just the right
height
off the work bench, and I slide the battery pack back and forth against
the saw. This results in a very thin clean cut.
Note that
the c-clamps are clamping on the blade of the saw, not the back bone.
Also note that there are few pieces of paper under the
plywood to
shim it to just the right height.
The
first problem is to open up the battery pack. The first time
I
did it I just used a razor saw (Proedge #01370, 30 teeth per
inch,
1.5" deep, 5" long, $2.79 on sale at the local hobby shop) and, while
it worked, it was tedious and the results weren't as clean as I'd like.
So I built a fixture to hold the razor saw just the right
height
off the work bench, and I slide the battery pack back and forth against
the saw. This results in a very thin clean cut.
Note that
the c-clamps are clamping on the blade of the saw, not the back bone.
Also note that there are few pieces of paper under the
plywood to
shim it to just the right height.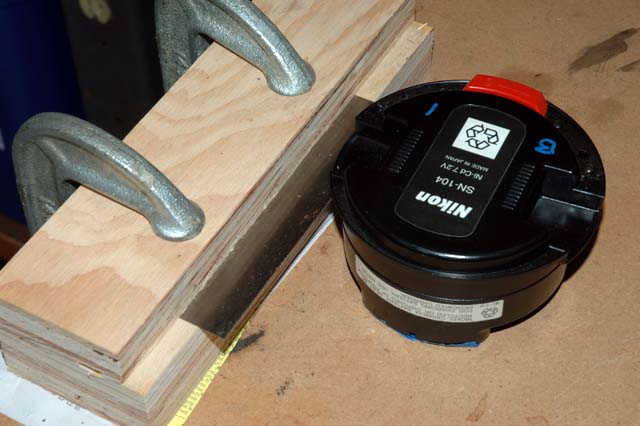 You
don't want to use a hacksaw as that would result in a wide saw kerf and
the battery pack would be thinner when reassembled.
You
don't want to use a hacksaw as that would result in a wide saw kerf and
the battery pack would be thinner when reassembled.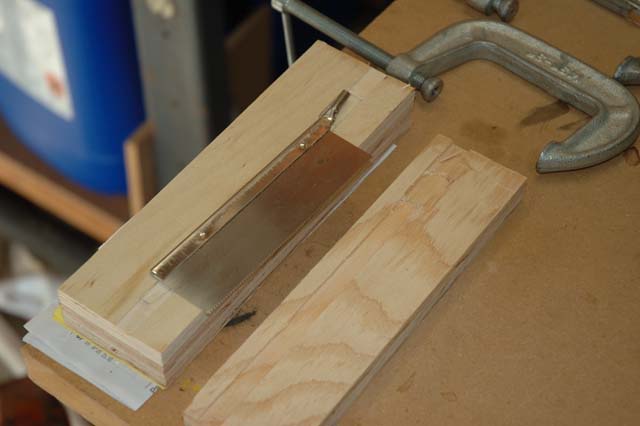 Here's
what the fixture looks like inside. There's just a groove for
the
backbone of the saw, and a little extra bit cut out for where
the
handle attaches to the blade.
Here's
what the fixture looks like inside. There's just a groove for
the
backbone of the saw, and a little extra bit cut out for where
the
handle attaches to the blade.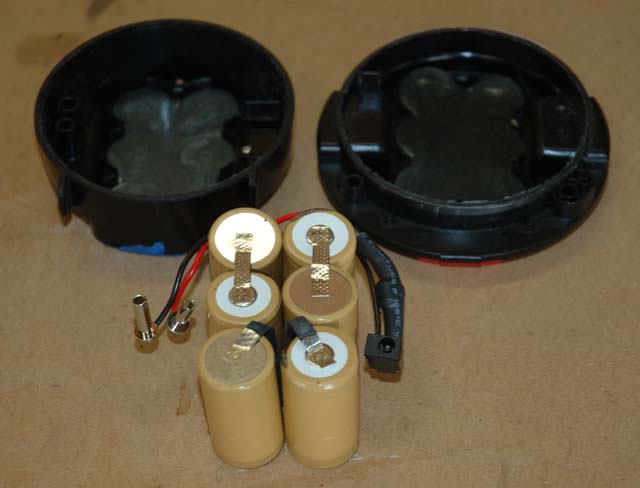 Here's
what it looks like when it's opened up.
Here's
what it looks like when it's opened up.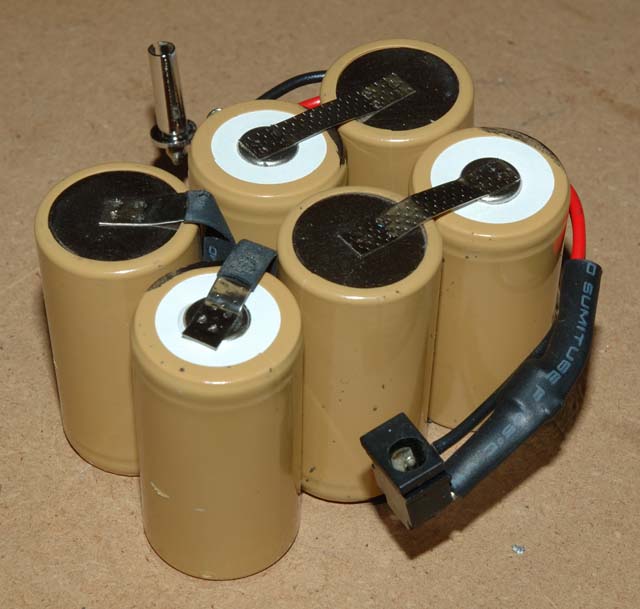 Here's
a closeup of the original battery pack. Note the connections
on
the left-hand cells that go down into the middle of the pack.
This is a thermal fuse, it will blow if it gets too hot, or
if
there's too much current.
Here's
a closeup of the original battery pack. Note the connections
on
the left-hand cells that go down into the middle of the pack.
This is a thermal fuse, it will blow if it gets too hot, or
if
there's too much current.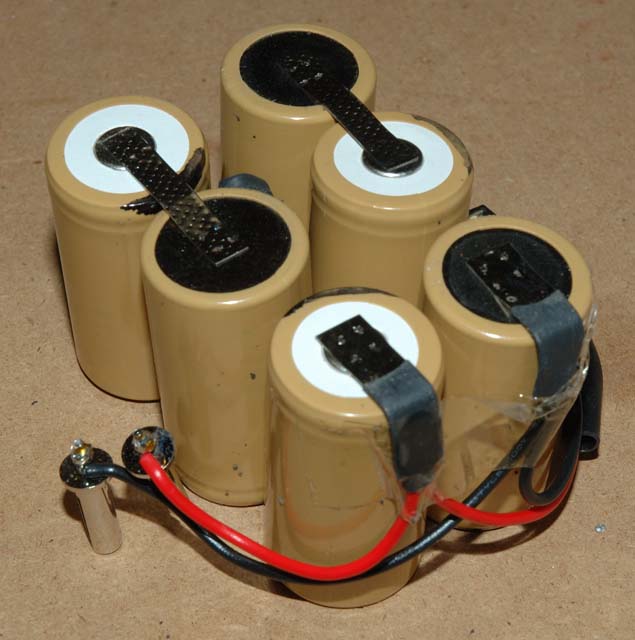 Here's
the other side.
Here's
the other side. Note
the lump inside the black heat-shrink tubing in the lower right.
That's a diode so you can't accidentally discharge the
battery
back
through the charging port.
Note
the lump inside the black heat-shrink tubing in the lower right.
That's a diode so you can't accidentally discharge the
battery
back
through the charging port.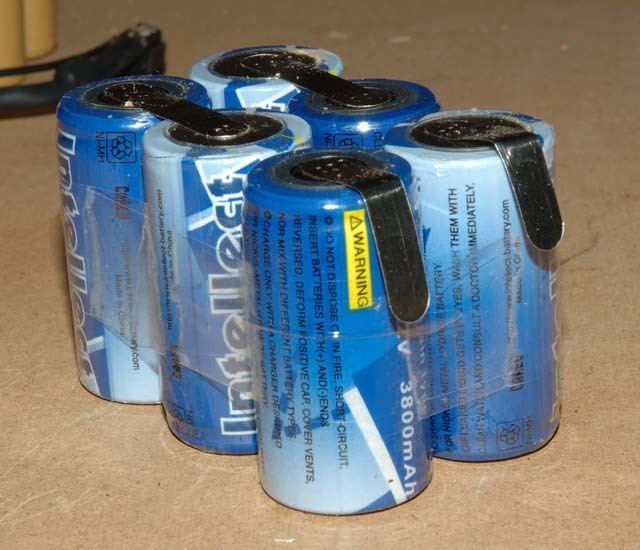 Here
we have the new batteries as delivered. Note that there are
no holes in the tabs to solder the old connectors onto.
Here
we have the new batteries as delivered. Note that there are
no holes in the tabs to solder the old connectors onto.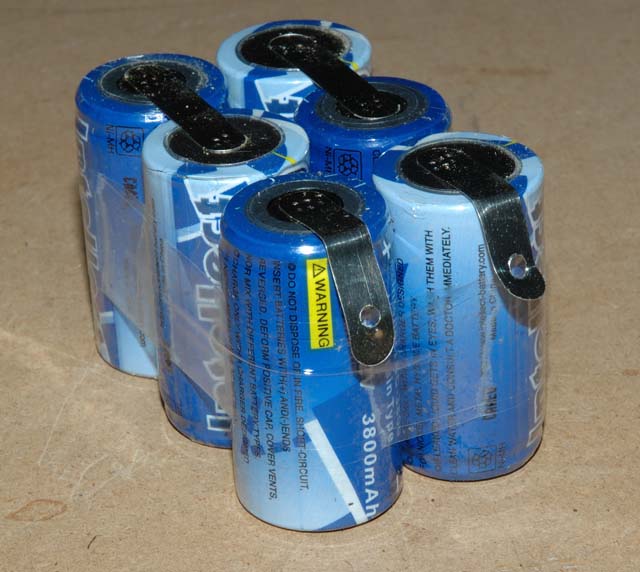 So we punch a
couple of small holes for the wires to the old connectors.
So we punch a
couple of small holes for the wires to the old connectors. Now we have
inserted the new batteries into the bottom of of the pack.
Now we have
inserted the new batteries into the bottom of of the pack.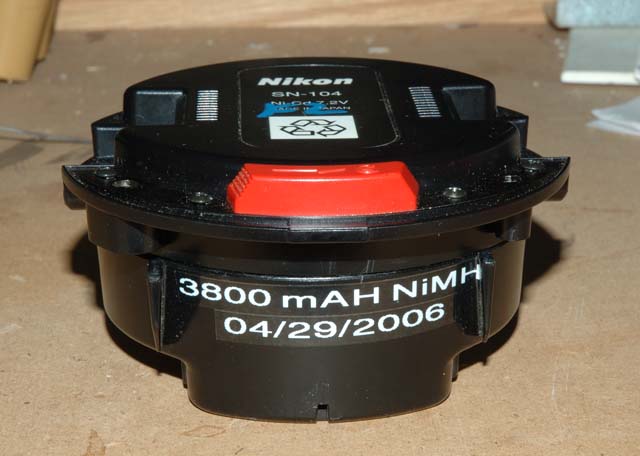 And
we put the lid on and label it with what's inside and the date.
A little Scotch Magic Tape to hold it together and we're done.
And
we put the lid on and label it with what's inside and the date.
A little Scotch Magic Tape to hold it together and we're done.Note that the first charge will take several hours. Remember that we have to pack more than twice as many electrons in there, and that takes time.