

December - Depressed Center flat cars
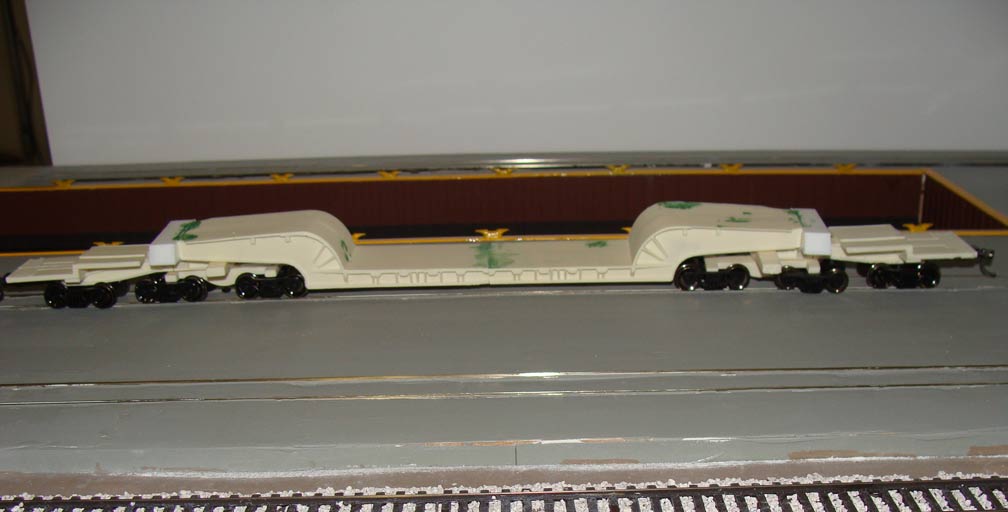
Working on two depressed center flat cars, both of these are resin kits. The first is KWUX 10 made by Concept Models. It is not a simple kit, there are over 100 pieces. This 12 axle depressed center flat car is models after QTTX 130975, it was originally CN 674200. It is a resin model and was purchased on EBay from the seller wreckmodels.
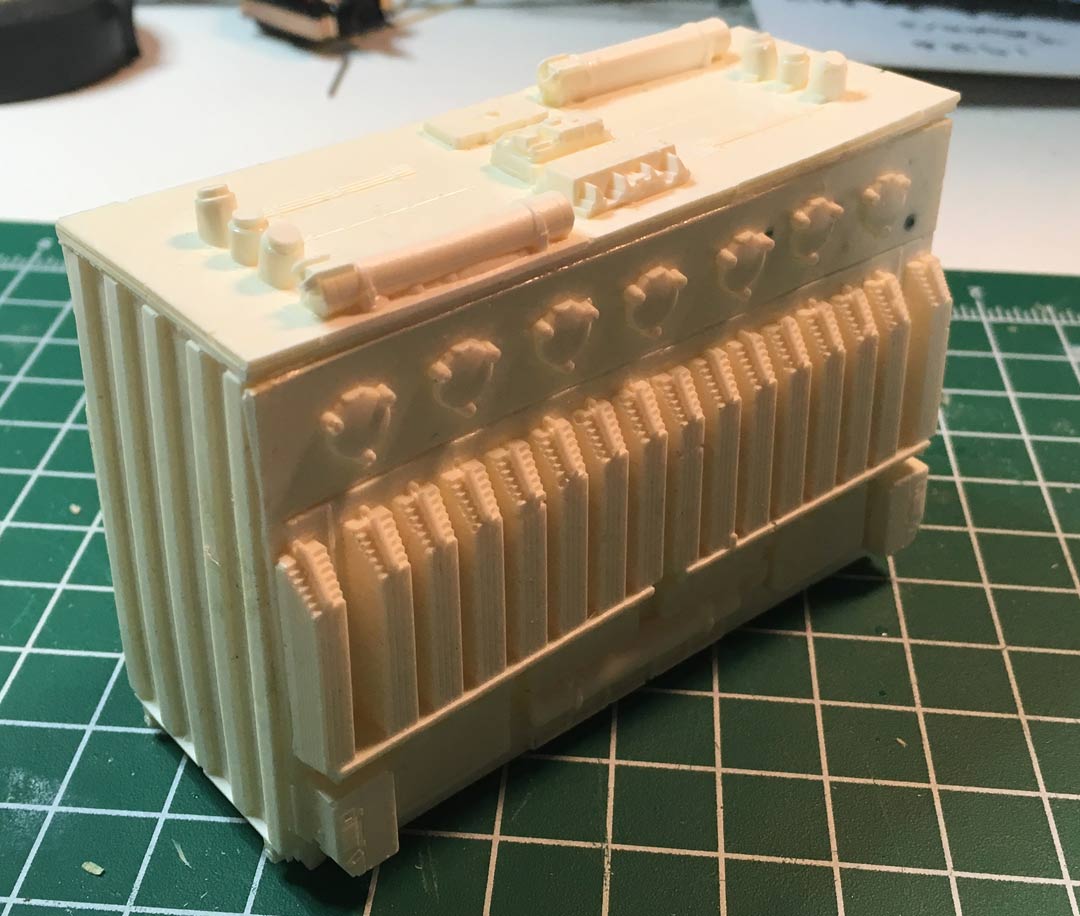
December - Loads
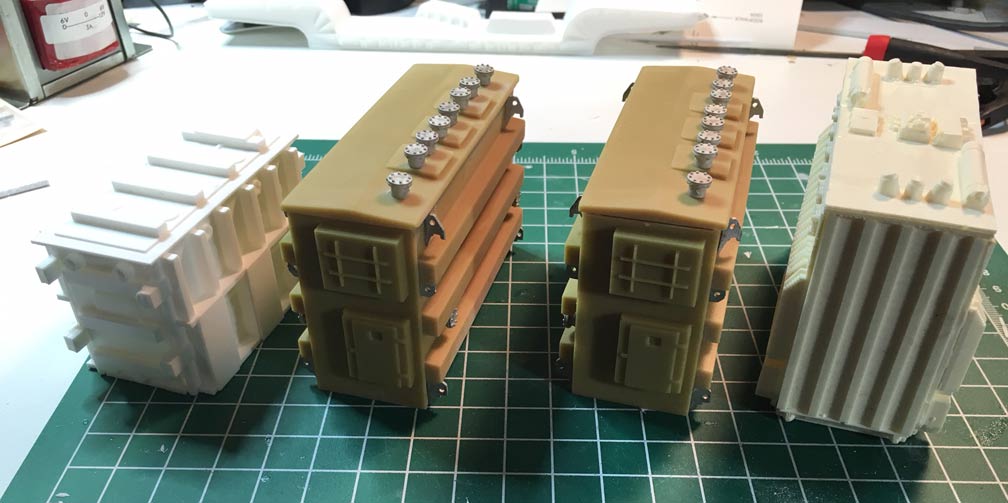
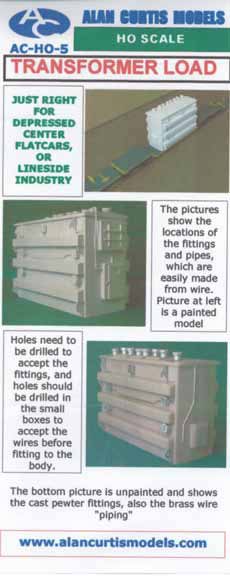
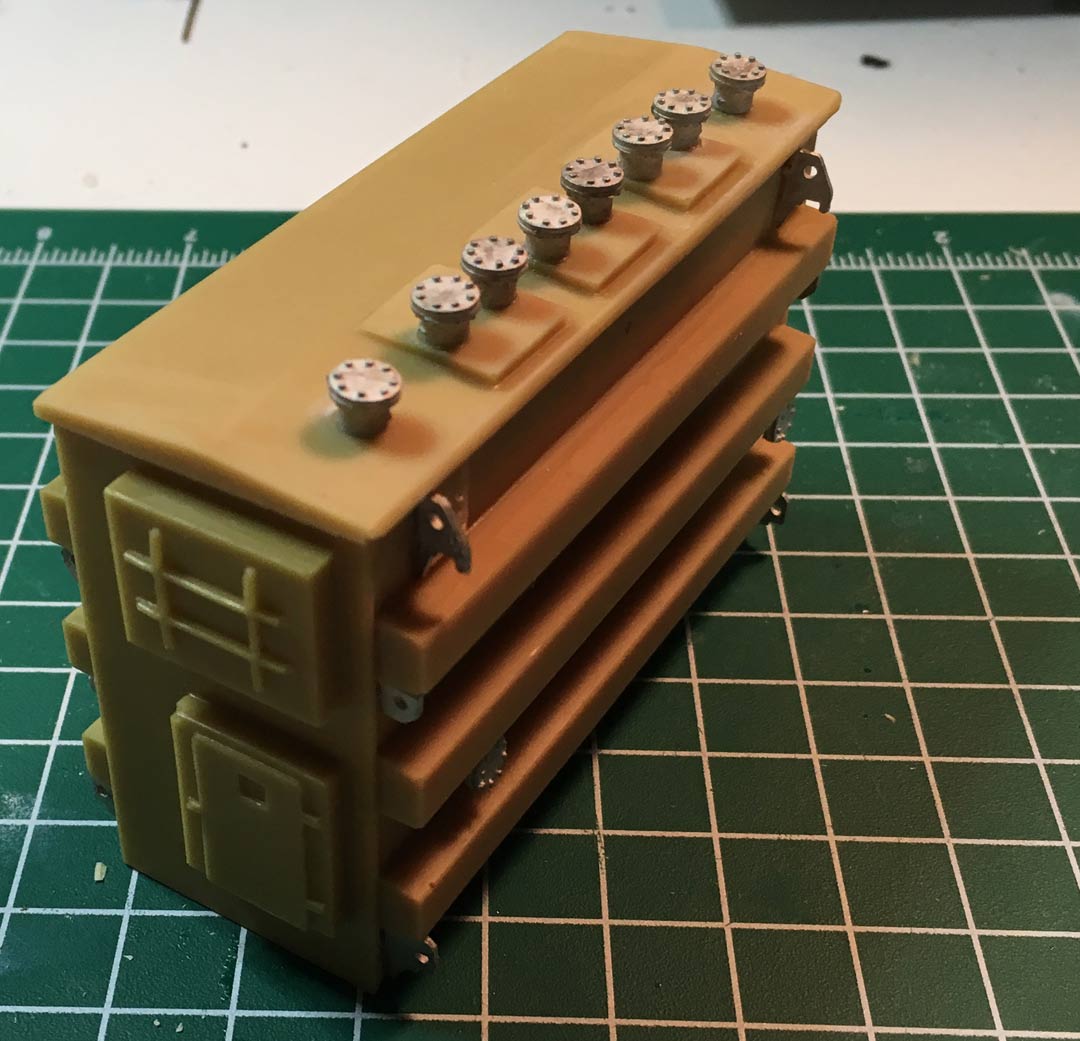
Completed building four transformer loads, they are now ready for paint. Two were Alan Curtis models, one from ebay, and the other one is from Concept Models. The Alan Curtis transformer loads are no longer available.
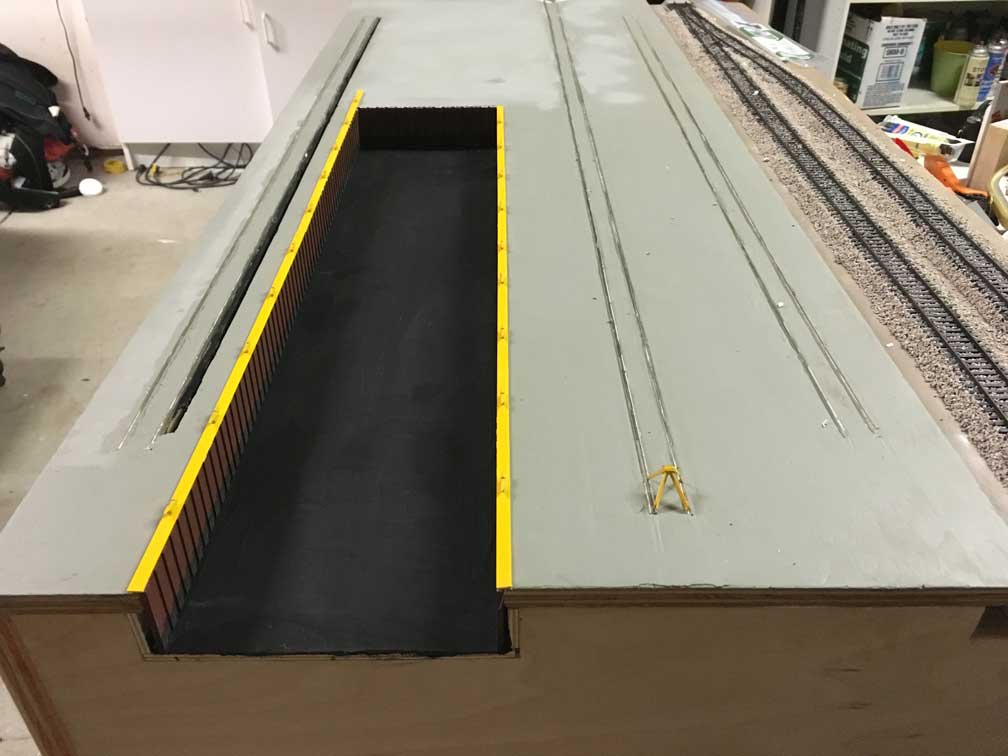
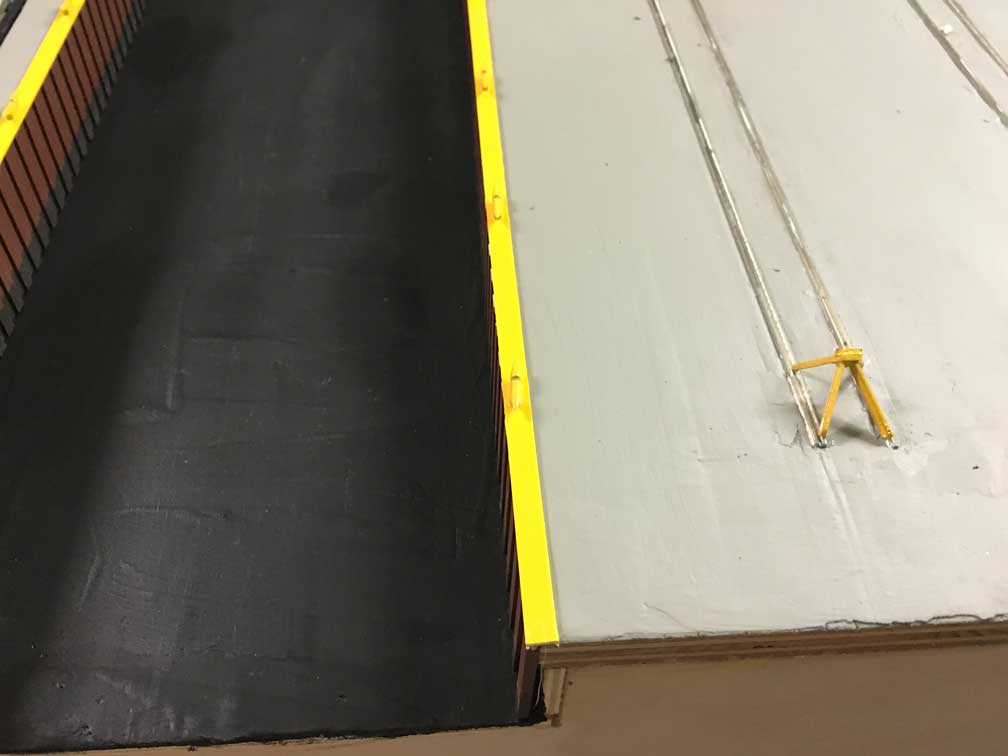
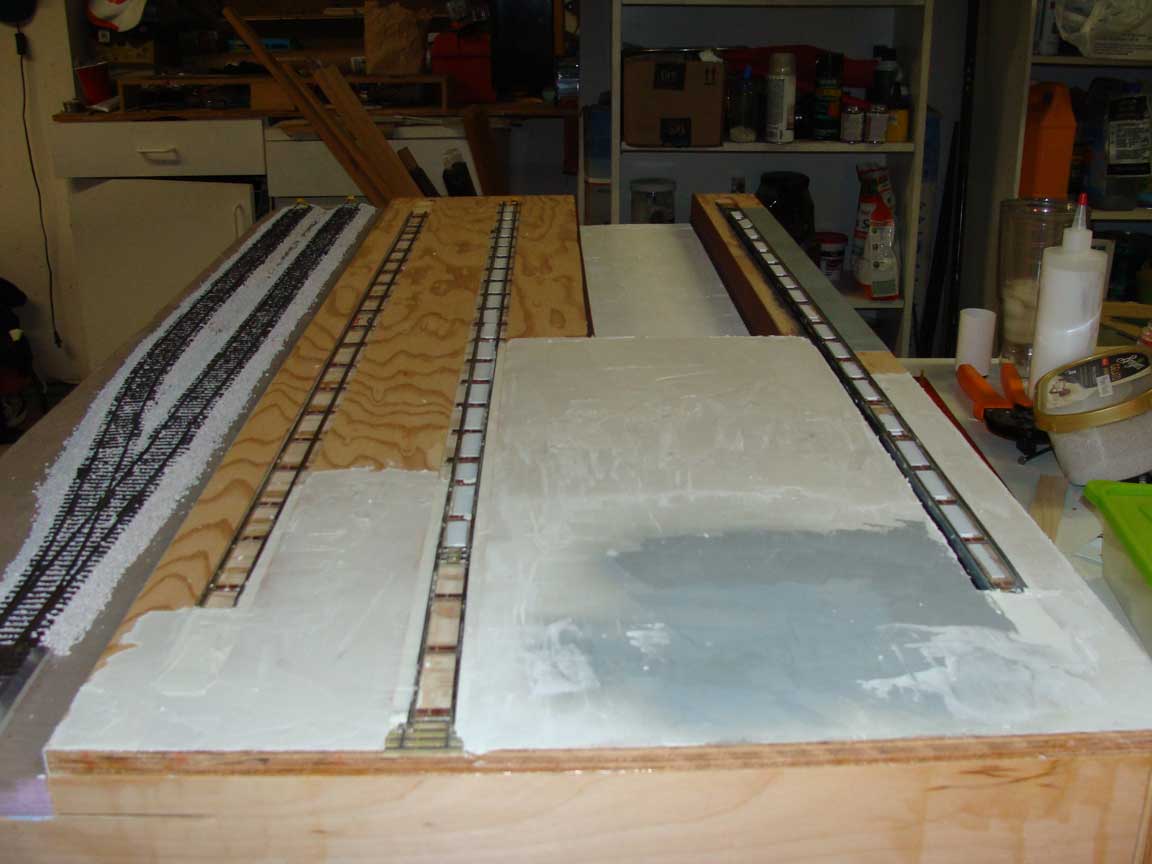
November - Port module work
The goal for November is to complete the port module. This
includes the painting of the concrete area, touch up around the
track and overspray with with Testors Flat Gull Gray. Seawall has
been glued. and the raised dock guard and bollards painted yellow
and installed. Switch machine installed. And the last step is to
pour the water.
I really like the way the piling seawall turned out.

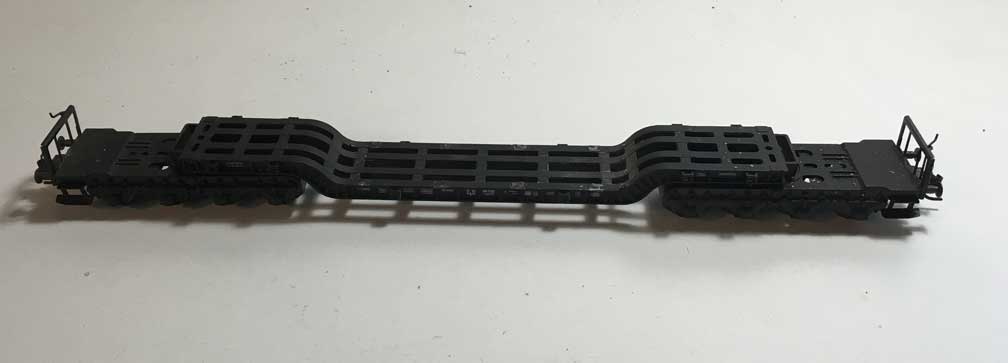
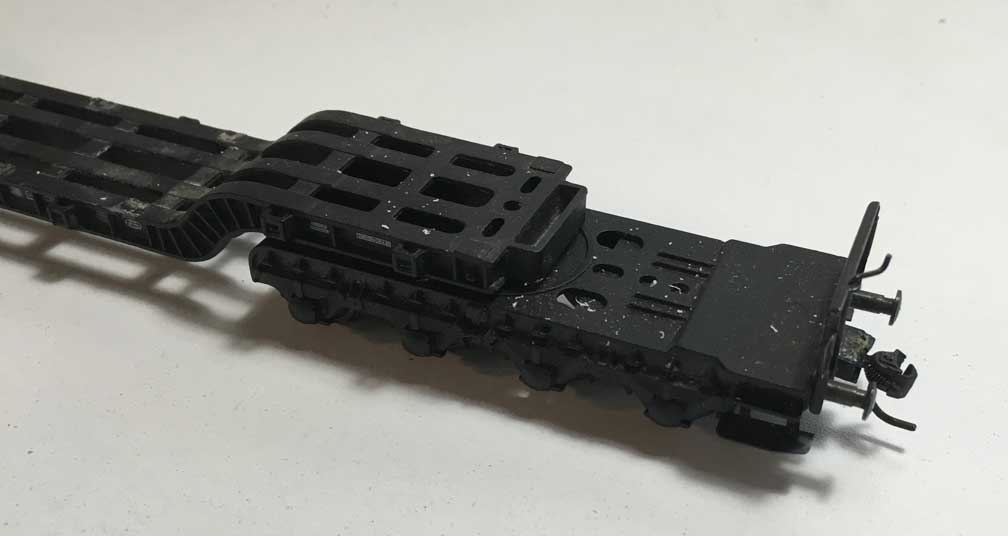
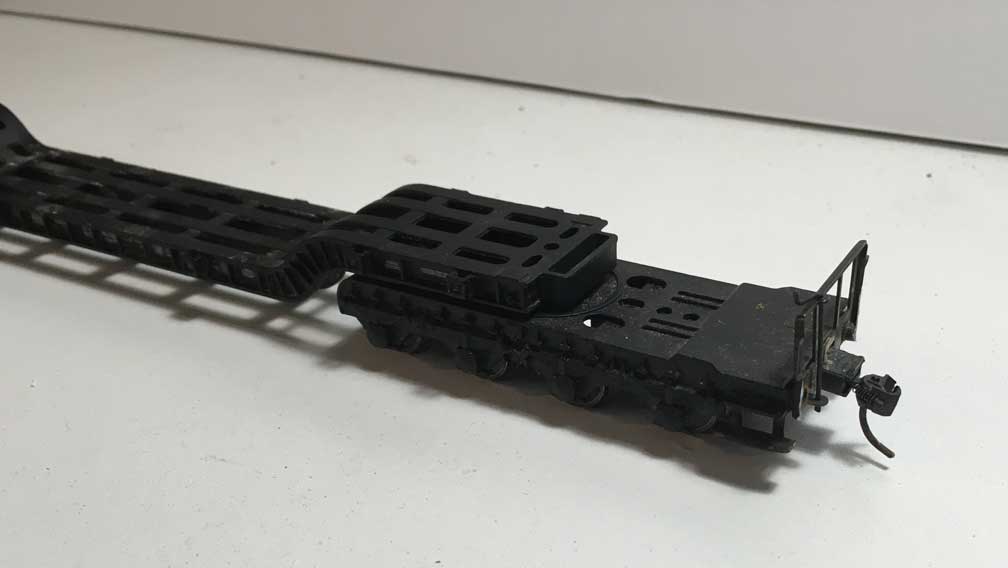
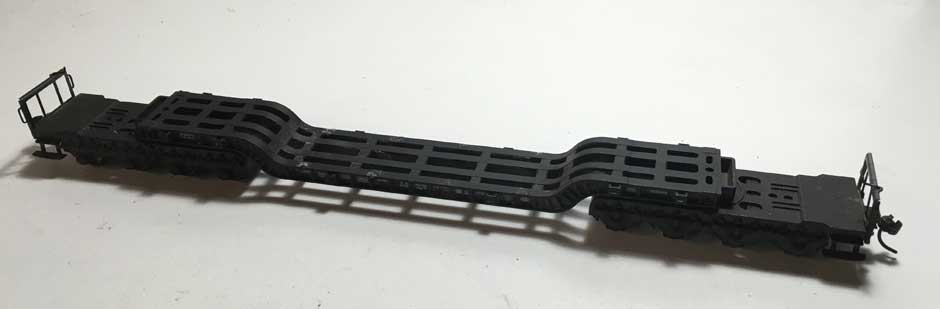
October - Americanization of an European wagon
I have had this car for a long time. Someone has started the Americanization process of this Fleischmann DB Tiefladewagen by replacing the original European couplers with Kadee's. I finished the process by removing the bumpers. The hand rails fell of when the second bumper was removed, that was fixed with a little ACC.
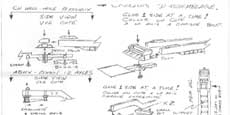
October - Building high wide cars
I have many high wide cars that need to be assembled, painted
and decaled. First in line is a resin model of the CN 670000
eight axle well hole car. I bought it on eBay three or four
years ago. This is a simple kit of 12 pieces. Like most resin
kits, lots of clean is up required, cutting, filing, filling
hole, and sanding. Forgot to take a photo of what this kit
looked like before starting, so I have included a copy of the
instructions.
For more details, there is an excellent article on this car and
the other CN well hole cars, by Ian Cranstone. The article was
in Volume 11, Number 1 of CN Lines. I believe that the back
issues is still available from the CN
Historical Society.
Prototype
photos
The next cars that are being worked on are the Eastern Car
Works 12 axle PRR type F-38 flat cars. This car type was
purchase by multiple railroads: Pennsylvania, Delaware &
Hudson, Louisville and Nashville Missouri Pacific, Cotton
Belt, Southern, Union Pacific and Babcock and Wilcox. The cars
were built with different deck sizes: 50, 45, 36, and 35 feet.
The capacity ranged from 290 to 350 tons. The first car will
be built, painted and decaled for the Pennsylvania Rail Road.
Prototype photo
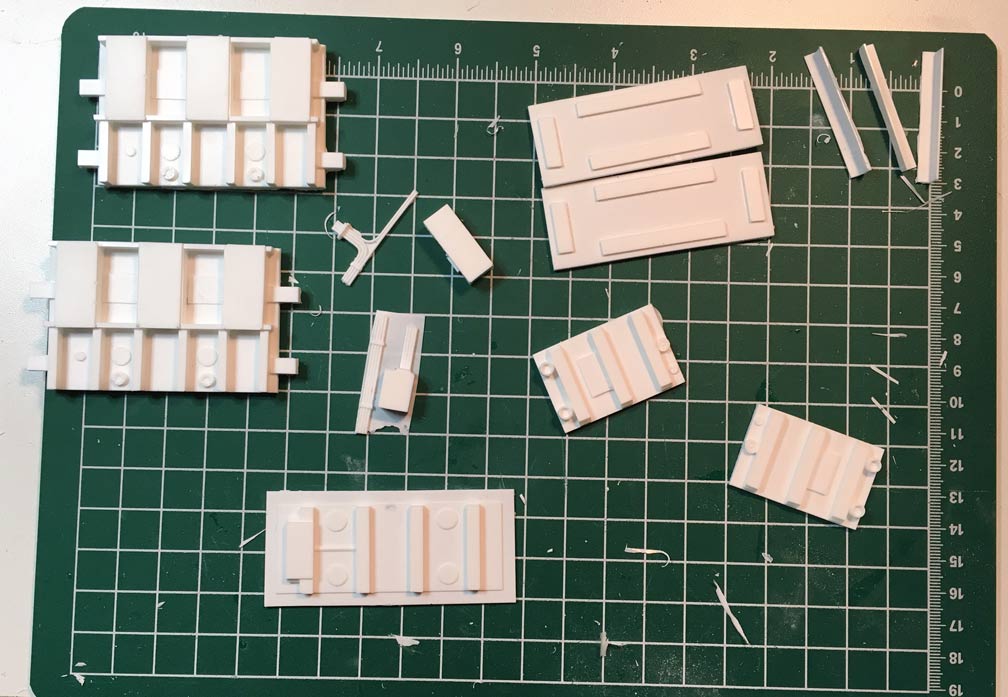
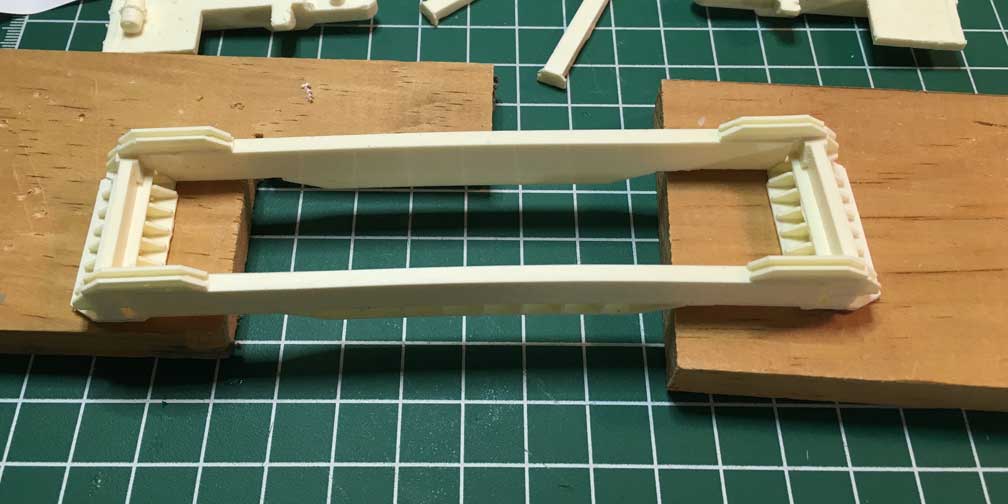
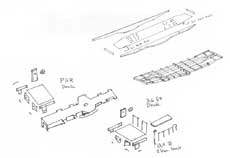
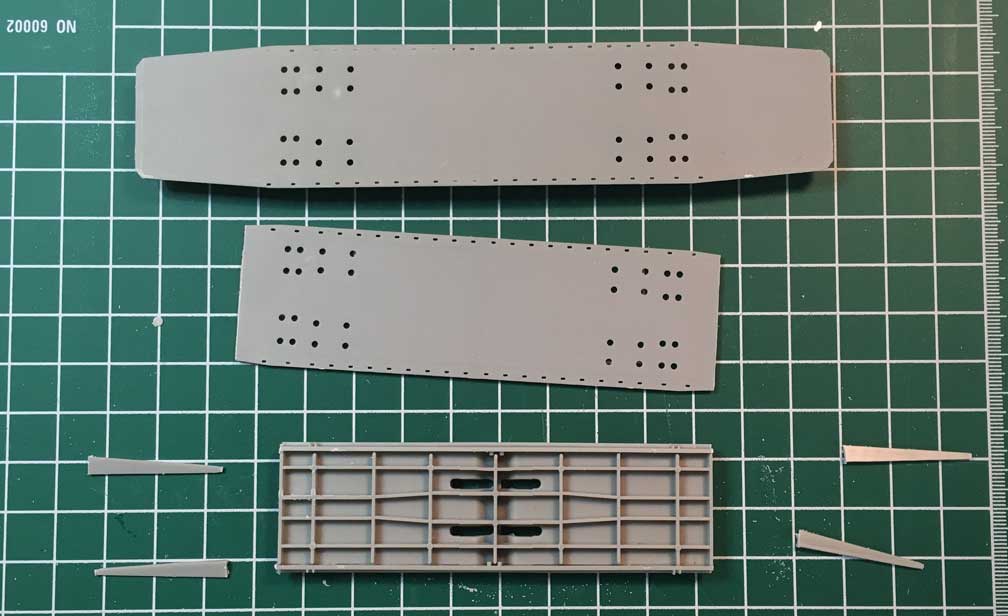
The instructions are poor, and not much help. Not much to
study, especially when doing the shorter deck version of the
car. There are many parts on the spruces that I cannot figure
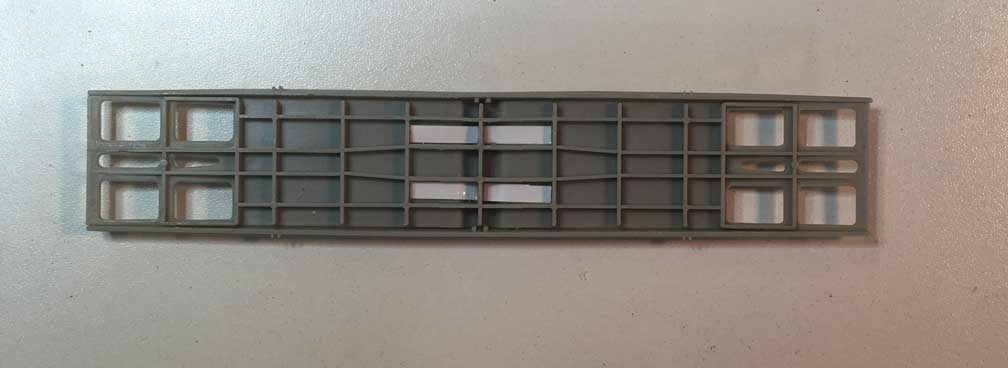
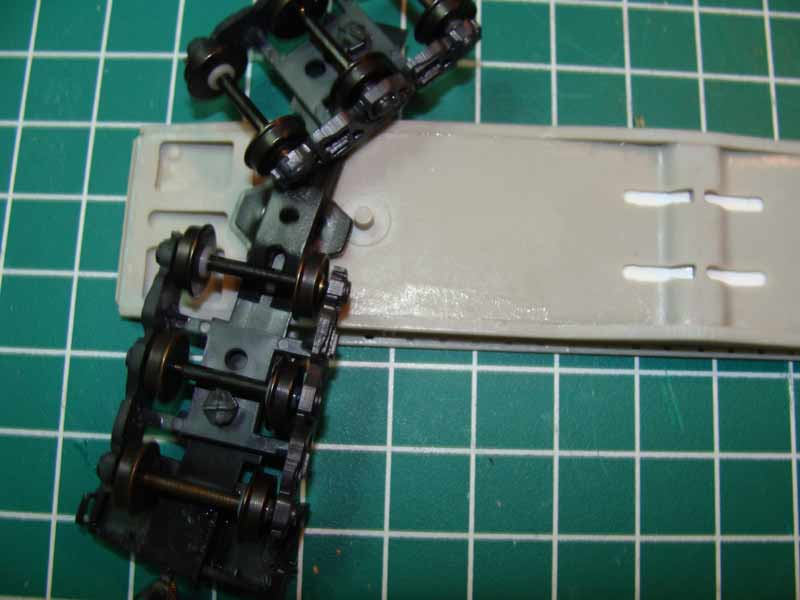
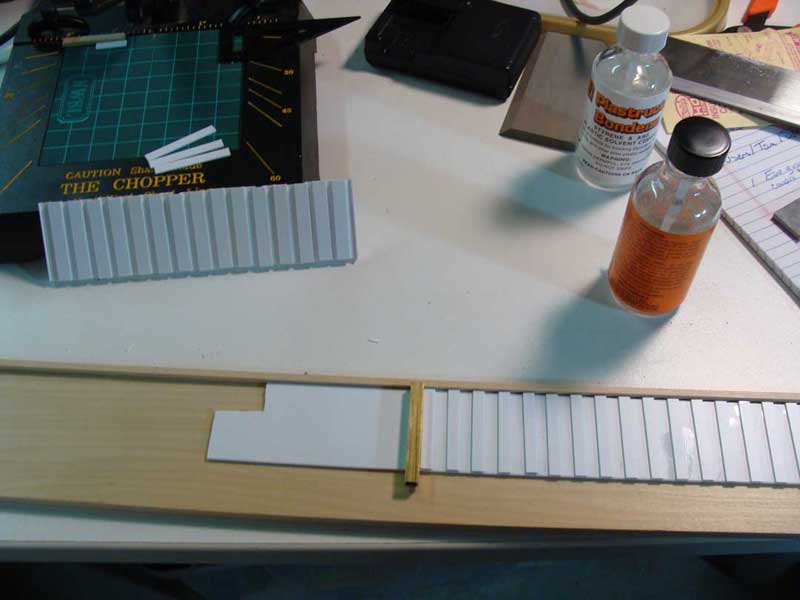
out where they go. The first step is to cover the four slots
at the middle of the car with .020 styrene strips. This will
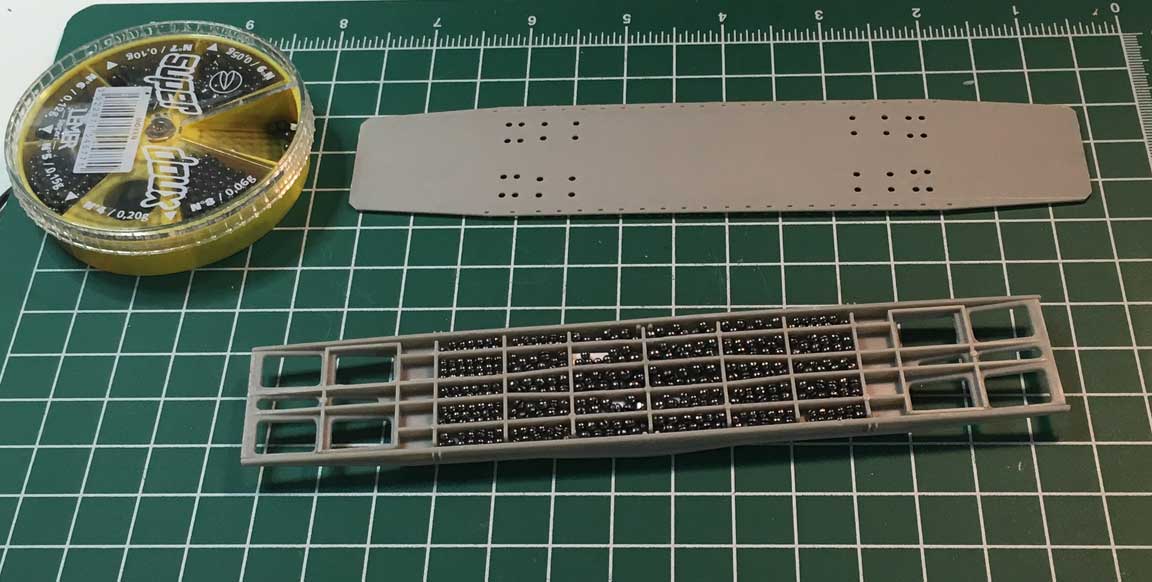
enable a little more weight to be added to the car. Then the
holes are filled in with various cut lead fishing weights.
Finally glue on the deck.

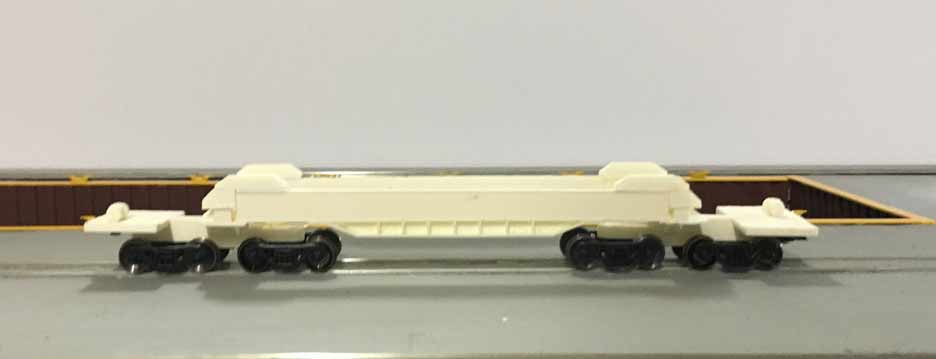
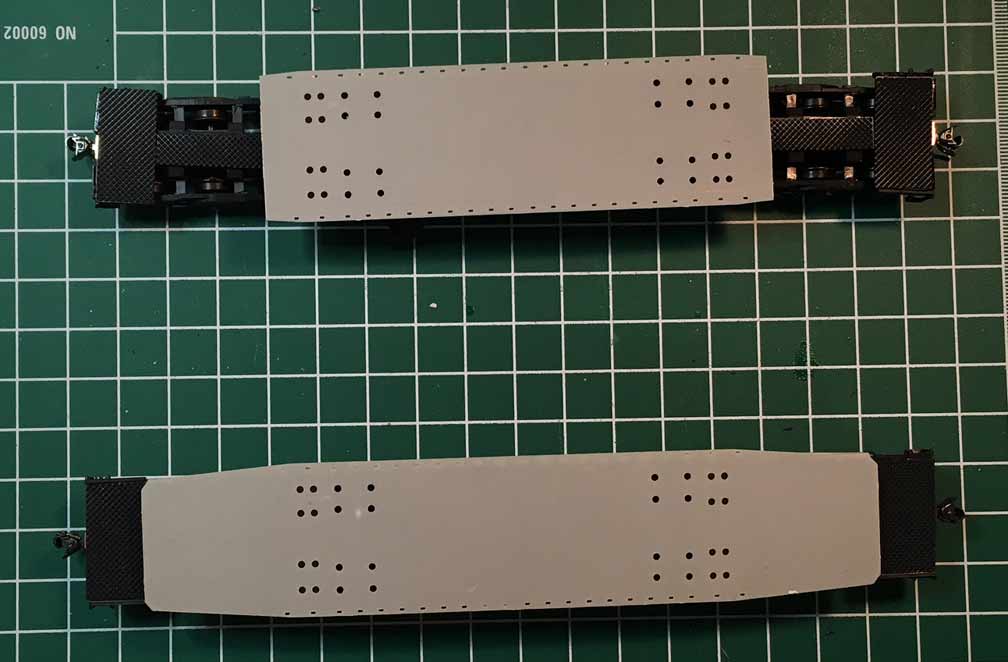
The second version of this car will be painted and decaled
for the Southern. It is different from the PRR version in
that the deck is shortened to 36 feet, 14 feet shorter than
the PRR car.
Prototype
photo
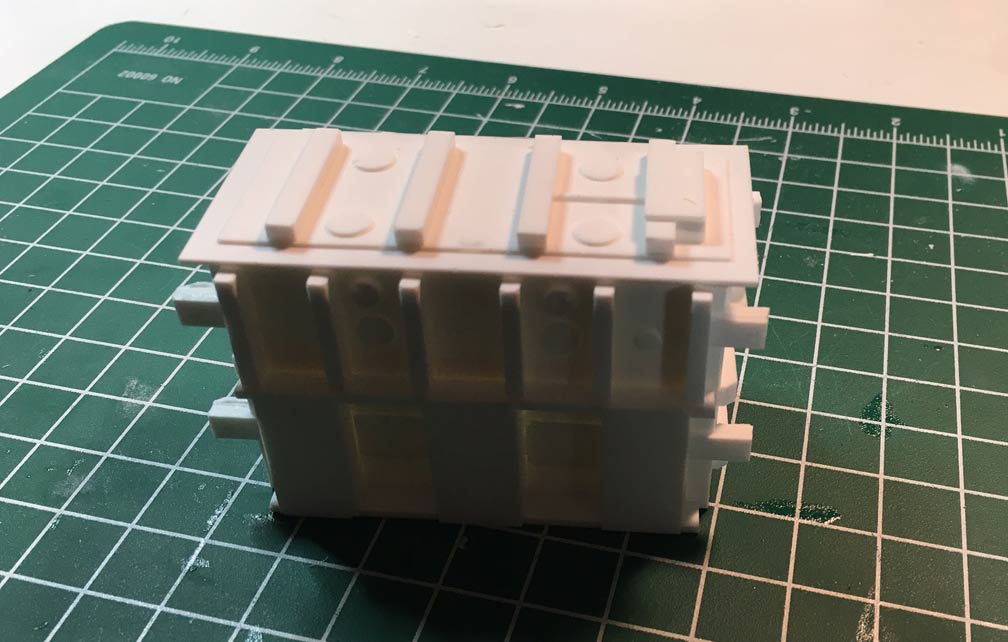
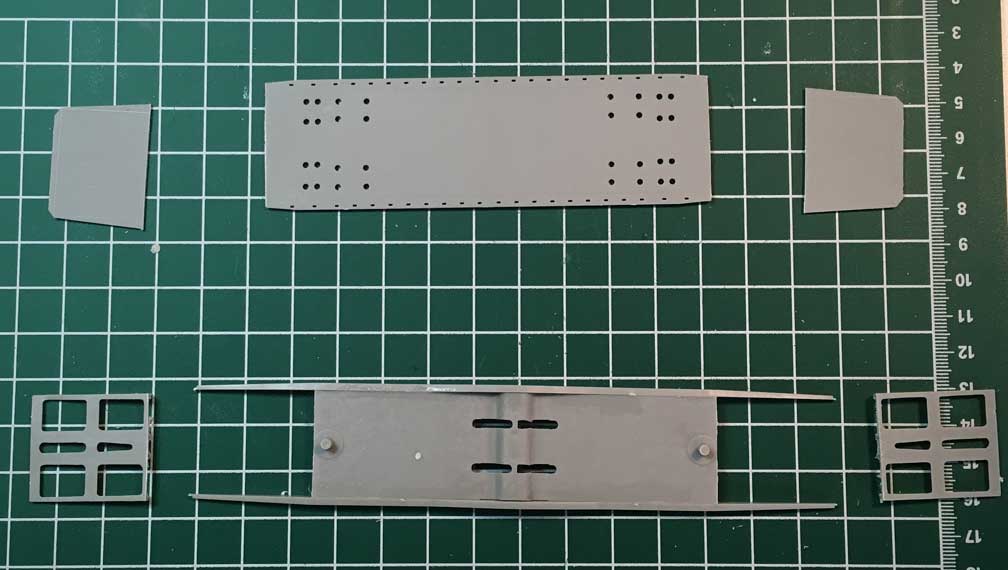
It was a little scary making the first cut onto the deck of
this rare kit. Then the bottom frame is cut and the side
frames glued. When the side frame are dry, they are cut to
match the bottom frame.
September - Adding DCC in non DCC ready locomotives
I installed decoders in two non DCC ready locomotives.
These two are my first locomotives where I had to do more
than plug in the decoder and program. The first is a
Walthers SW9, and the second locomotive is a Kato NW2.
The SW9 install is a much simpler process. Remove the light
board and replace it with an NCE SW9-SR decoder. Solder both
the truck and the motor wires, and test. The light bulbs
were replaced with warm white LED's, and then tested again.
Getting the wires back in the right place for the rear light
was a challenge when putting it back together. Program the
locomotive number with DecoderPro and tested again. To
complete the update, I replaced the horn hook coupler with
Kadee 148's couplers.
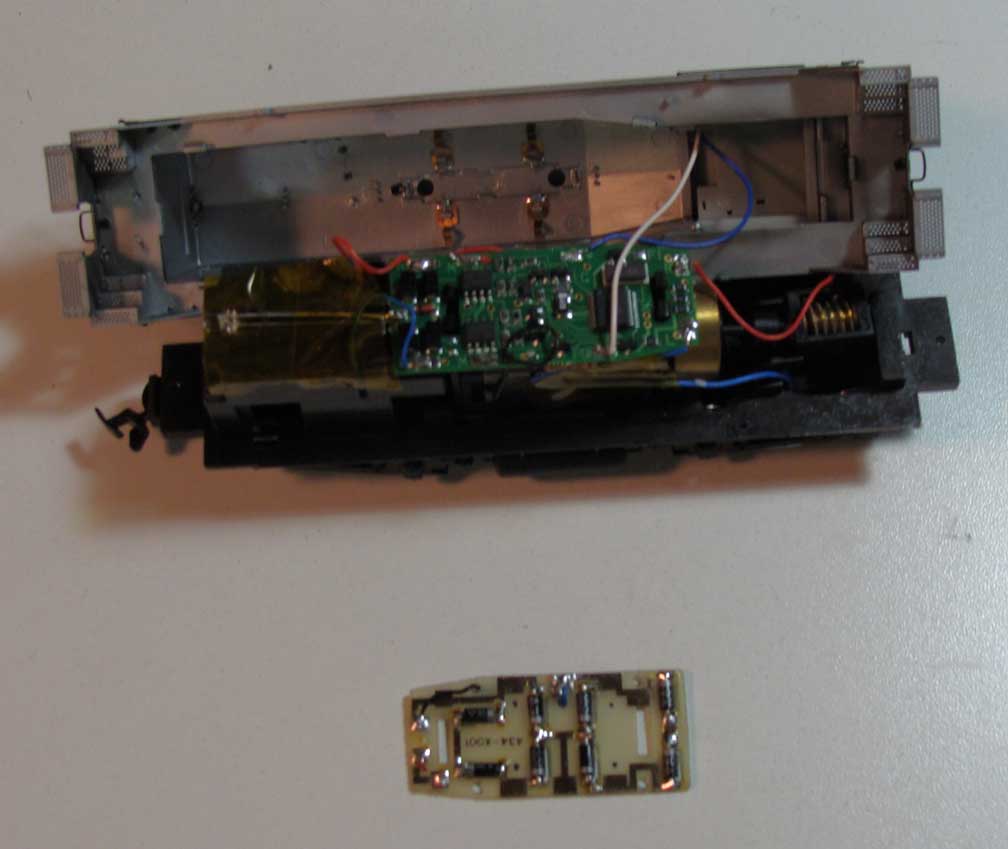
The NW2 requires more work. First the some of the weight
must be cut away with the Dremel to make space for the
decoder and the wires. The rear light board disintegrated
while I was soldering the new LED. Luckily, Kato had still
has these boards in stock. Solder the TCS M-1 decoder to the
motor and the brass strips that get the power from the
trucks, and test. Connect the LED's and test again. Finally
program the locomotive number. Then after running for a
while the front LED burned out. Took the loco apart again,
and found that the decoder has a problem and was putting out
13 volts on the pins to the LED. The decoder was sent back
to TCS. The great folks at TCS sent me one right back.
August - Port module work
The second crane track has be set and is parallel to the
first one. All of the tracks are now wired and tested.
Found the paint color that I like the best for the large
concrete area – Testor's Model Master light sea gray.
Started to cut and paint styrene for the concrete. The
styrene did not turn out as I wanted. Now, this area will be
covered with light weight spackle and then painted with the
light sea gray.
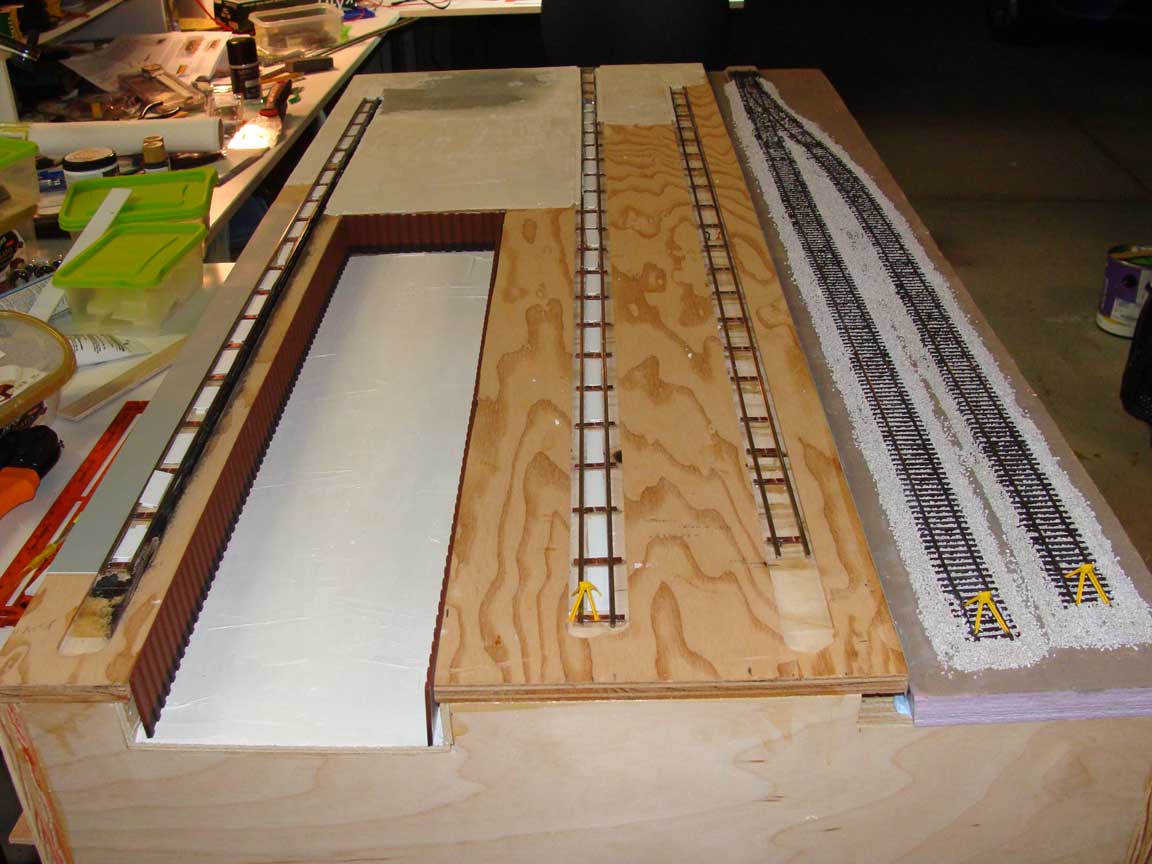
The two yard tracks were painted with Krylon camo brown
from a rattle can. Then tops of the rails were quickly wiped
off with a paper towel wrapped around a small piece of wood.
This picked up all of the paint on the top of the rails.
This is a much simpler process than air brushing or using
markers. The tracks have been ballasted and the yellow
painted bumpers installed at the end of the tracks.
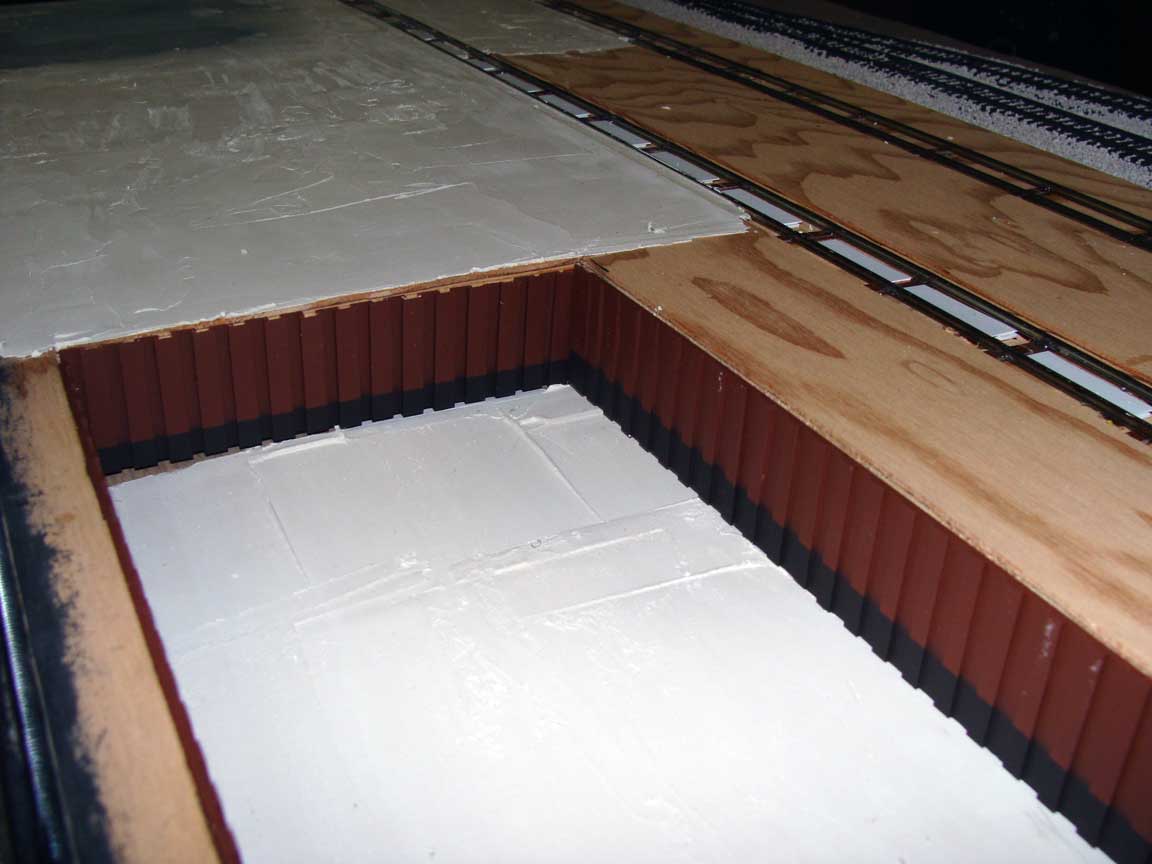
The piling walls for the port area have been built. Over 300
Evergreen strips were glued to a 1/8" styrene. A scrap brass
shape was used to keep the piling spaced evenly. They were
painted with rust brown on top and camo brown on the bottom.
The water area needs to be sanded and painted.
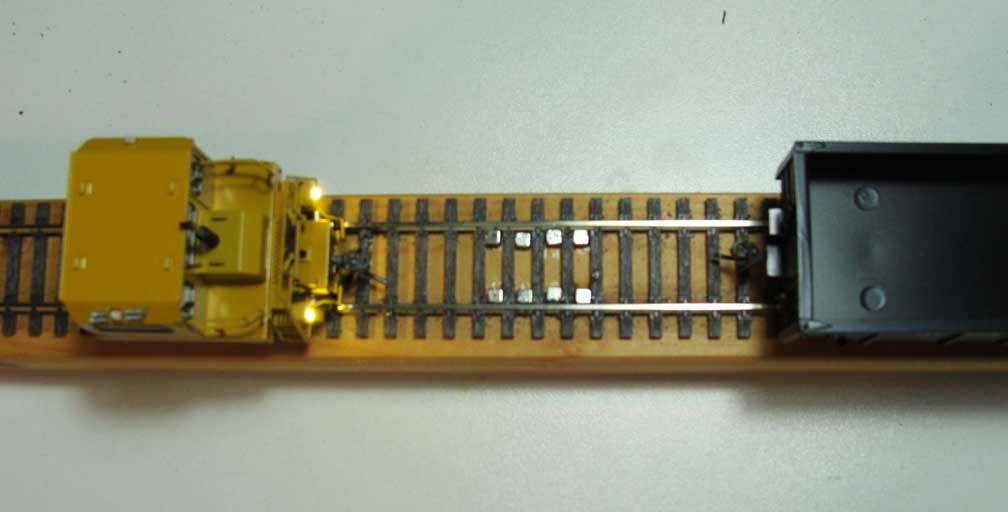
August - Neodymium magnets for uncoupling
I have never liked the looks of the between the rails Kadee
magnets. In my last layout, I used one of the Kadee
electromagnetic uncouplers, and did not like it either.
I have experimented with using neodymium magnets for
uncoupling. Getting them aligned properly took some
experimenting - North facing up on one side of the track,
and South facing up on the other side. Three magnetics works
great, four show no extra benefits. The trip pins must be
aligned correctly for this to work. The magnets should be
easy to cover with some fine ground ballast.
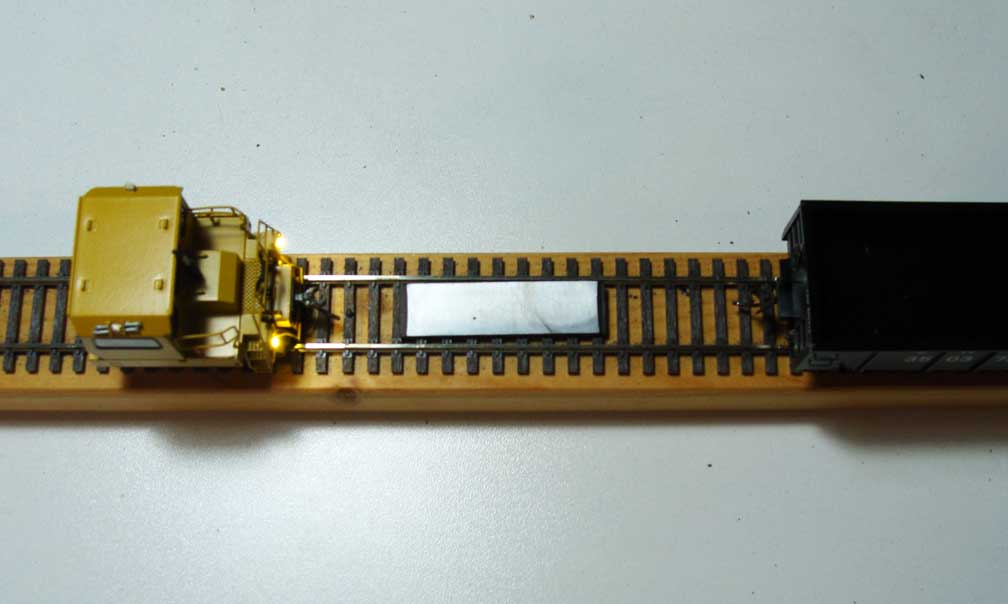
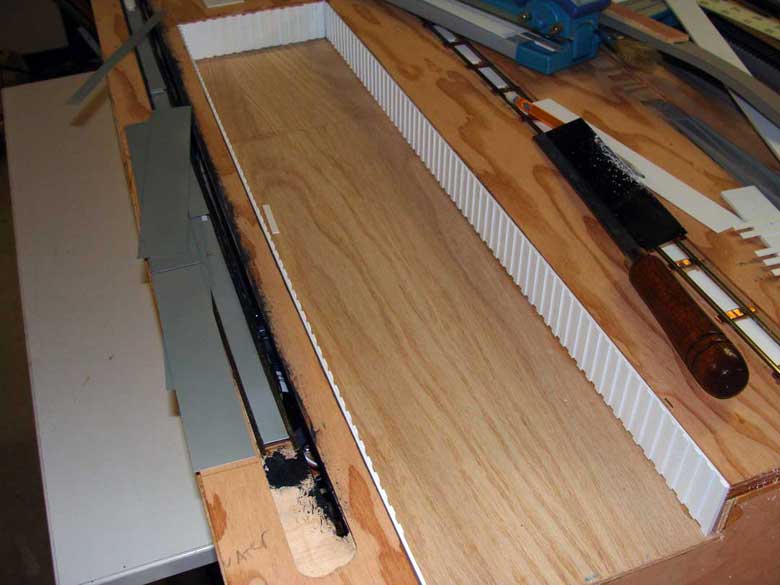
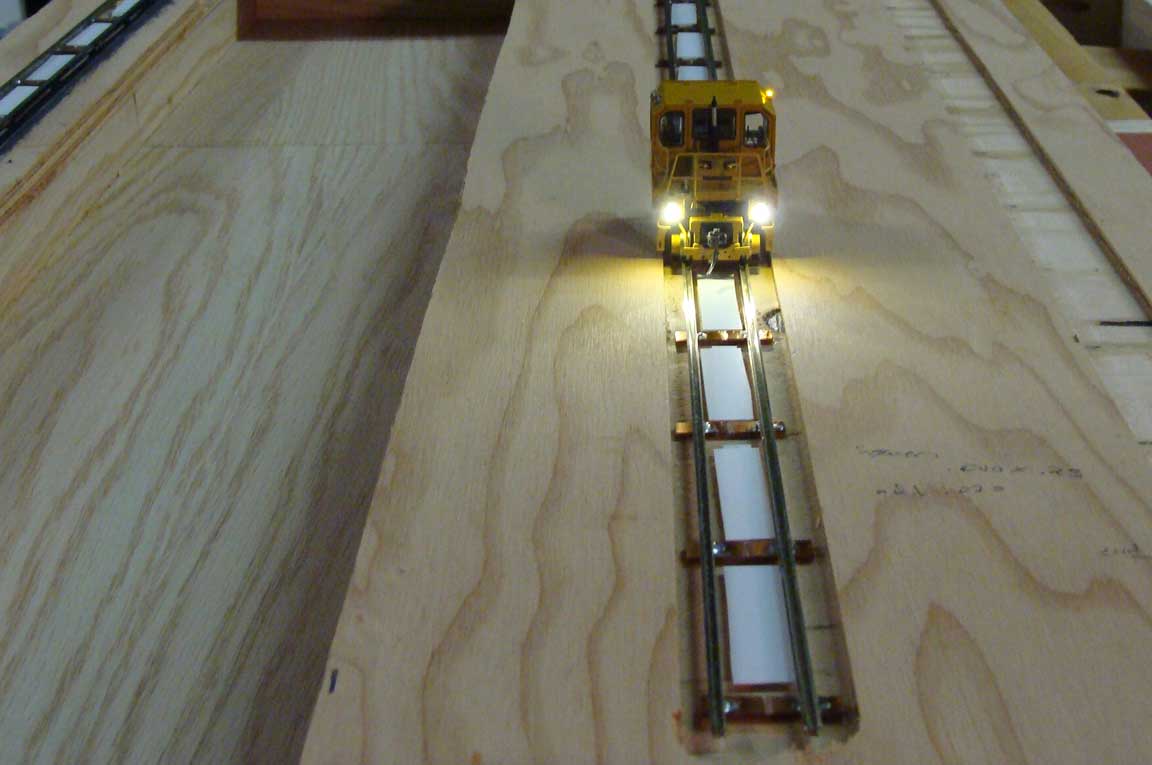
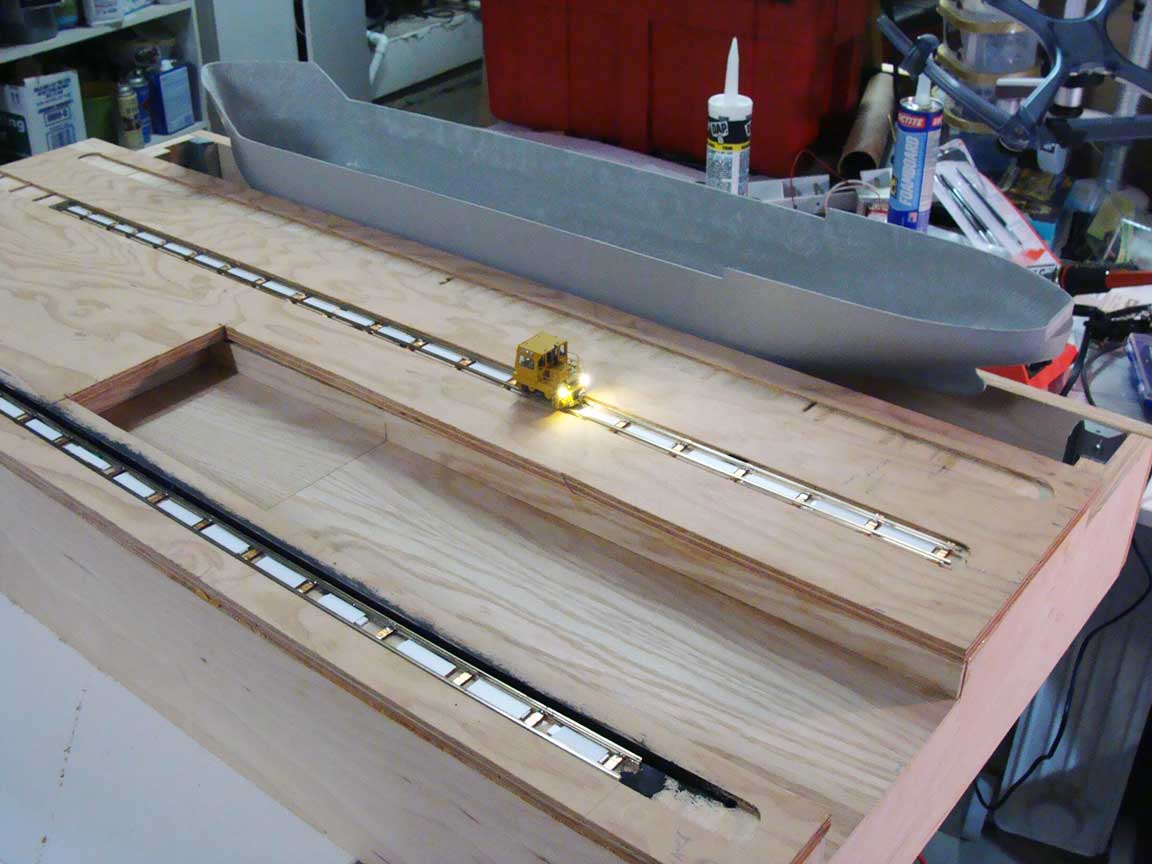
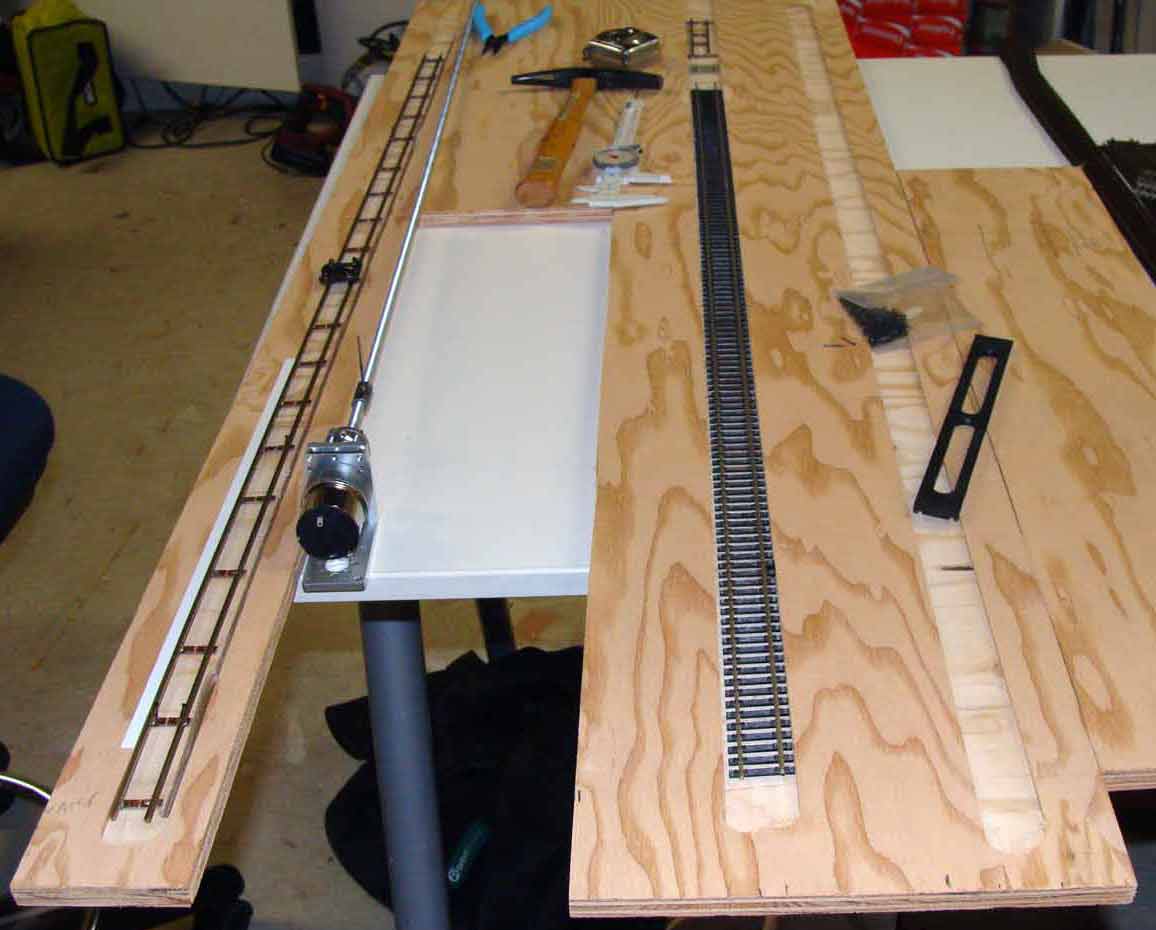
July - Barge Port Module
The wood work for the barge port module has been completed.
Two of the three tracks are glued down in the recess so that
the tops will be just slightly above the concrete.
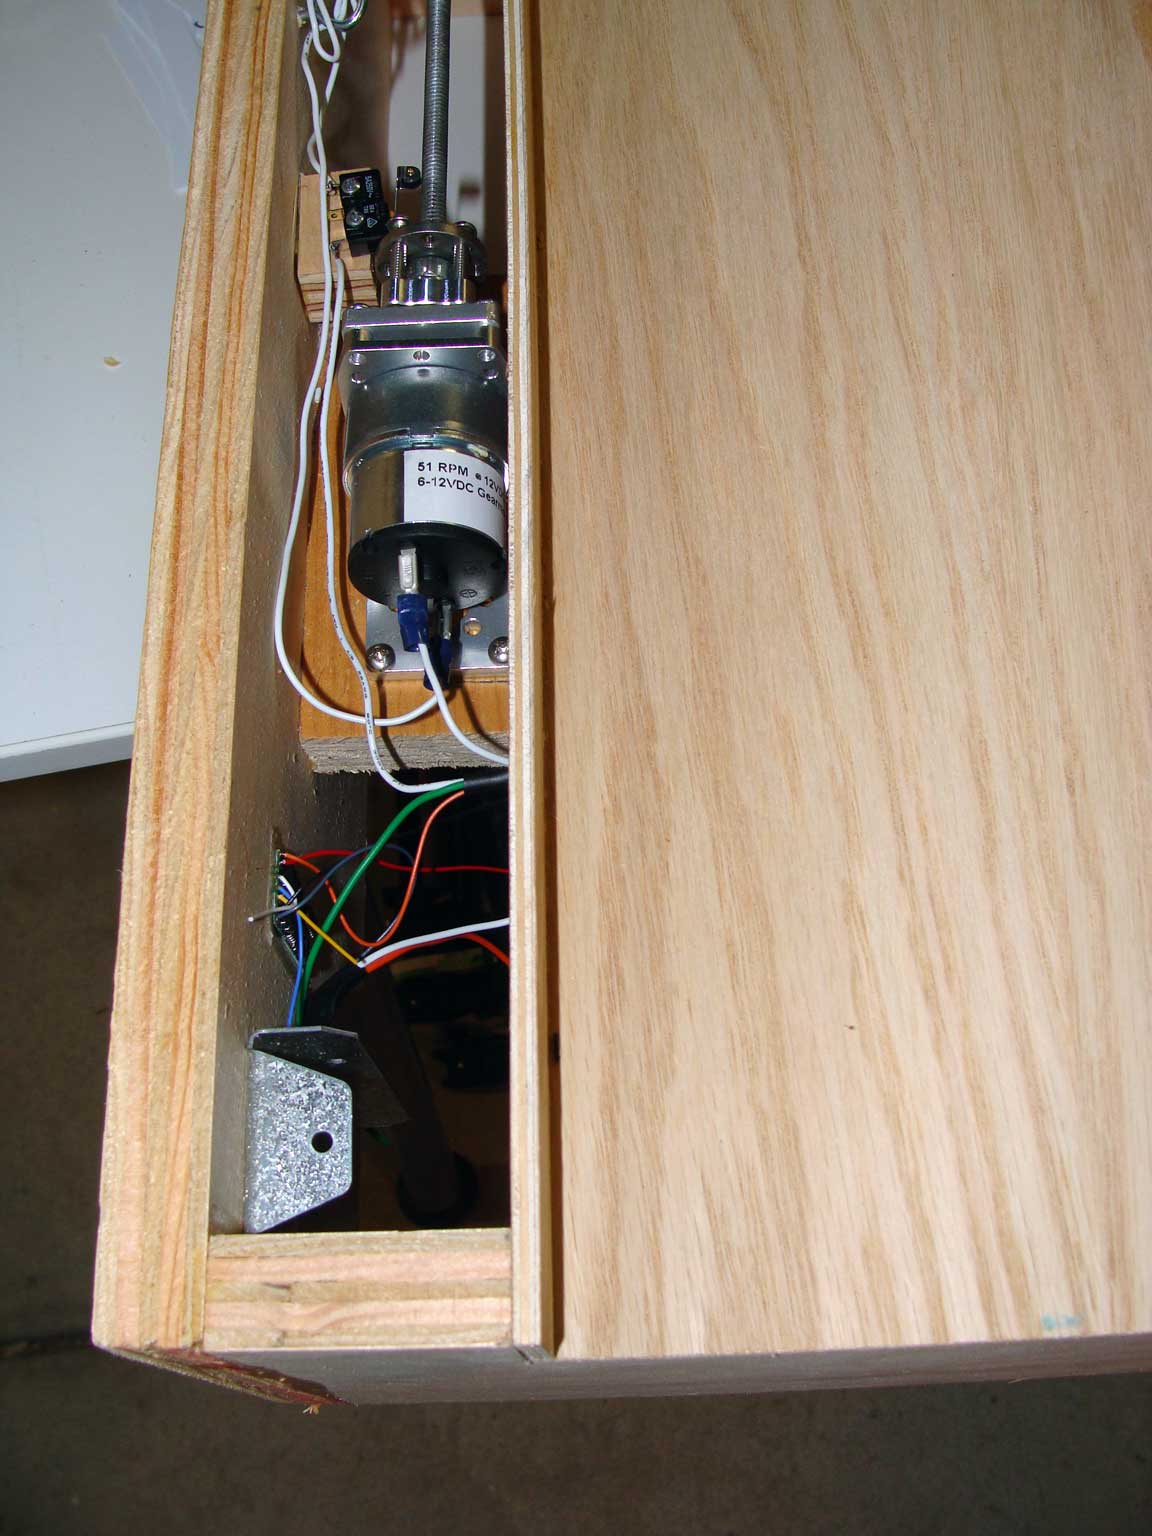
Basic wiring is in place, and the motor and threaded rod are
aligned and working. Micro switches have been added to stop
the travel if the operator is not paying attention. The
D13SR decoder has been programed to drive the motor at a
constant speed. Wiring has been check at each step. The
first run was completed with the trackmobile.
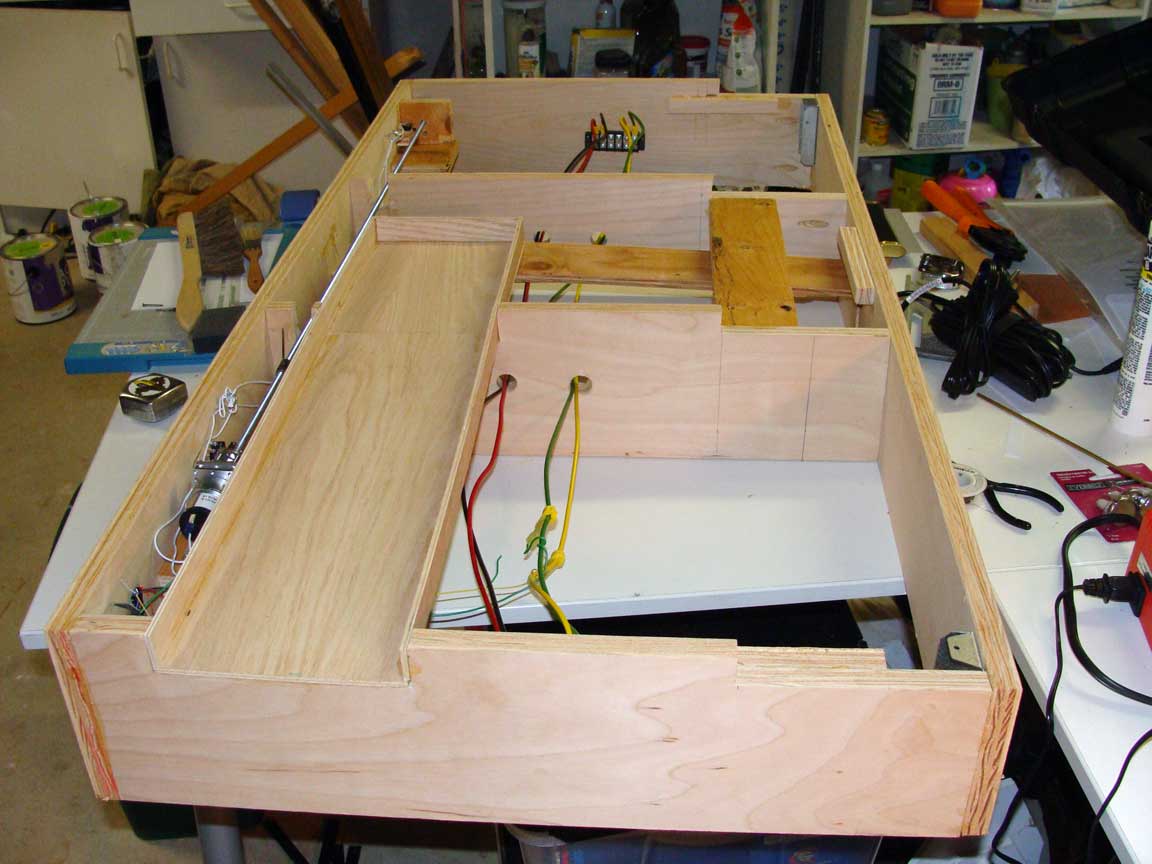
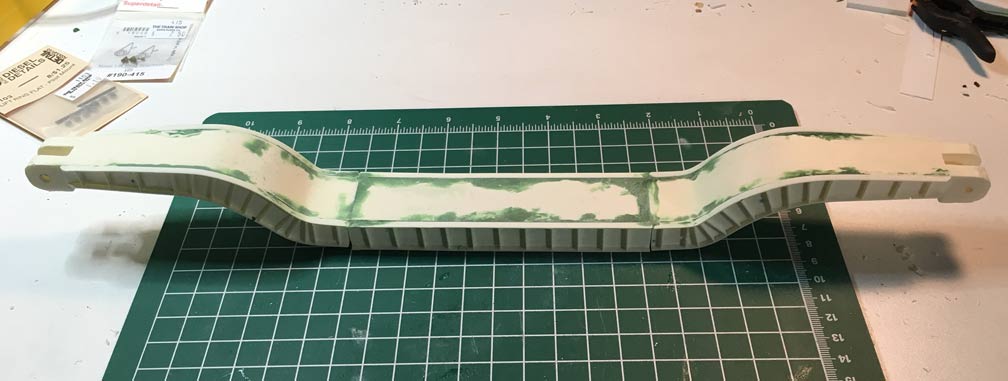
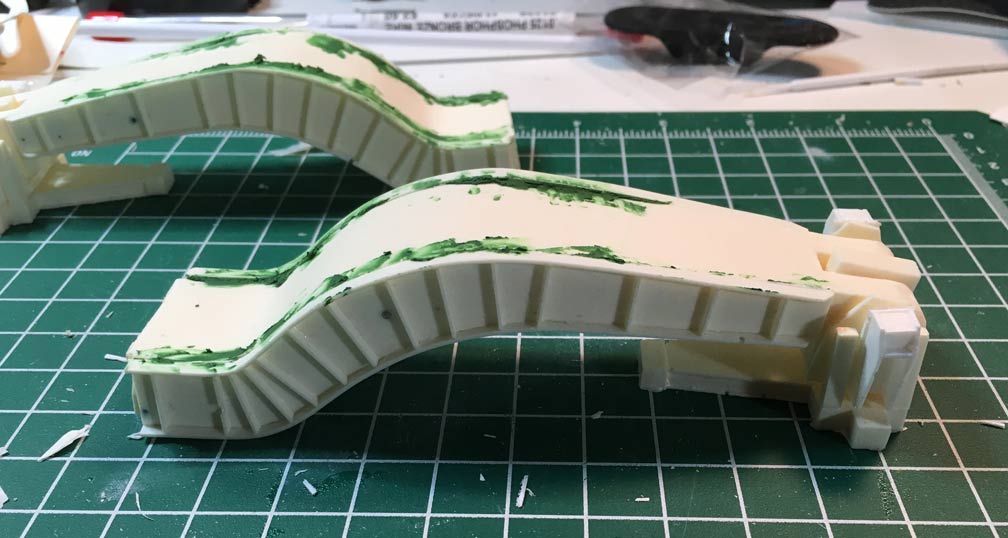
June - Barge Port Module
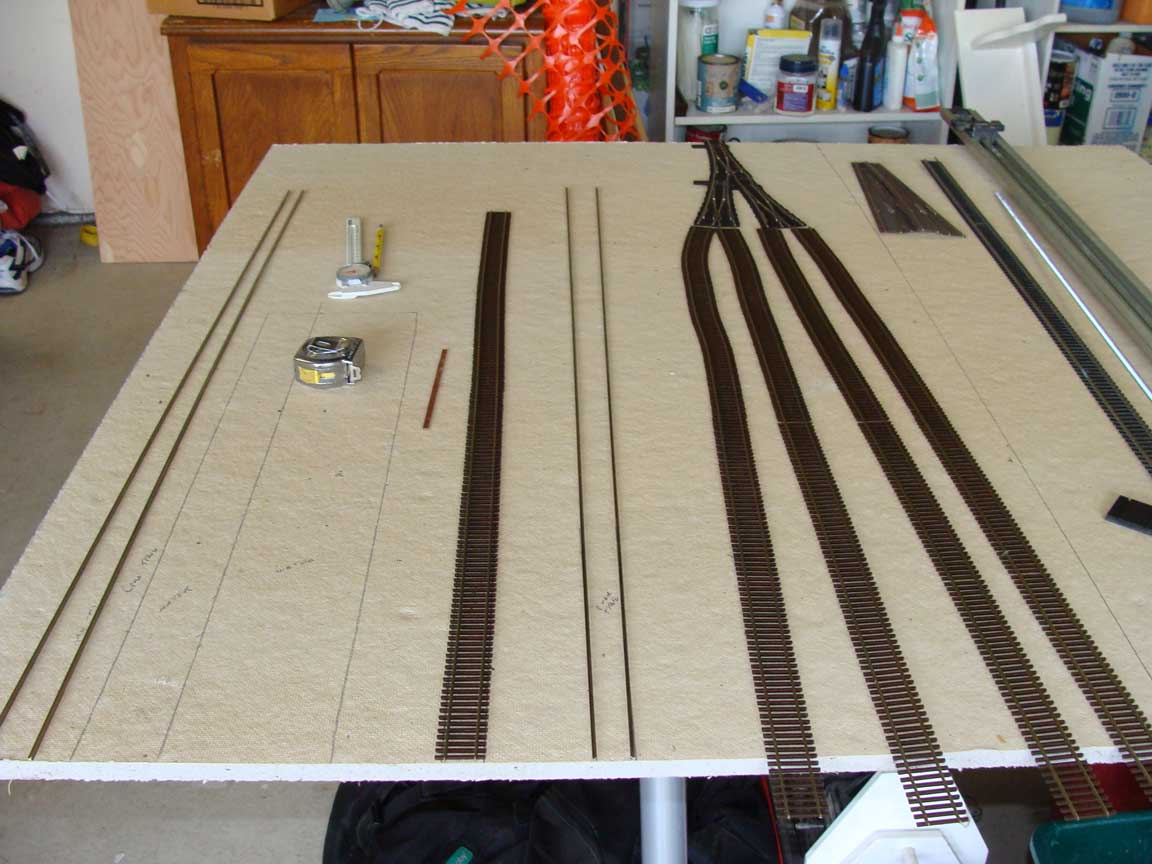
Started laying out and building the barge port module. The
left side will be the barge slip with the overhead crane,
and the right side will have a four track yard. This has
been cut down to two tracks, and the module's width will be
smaller.
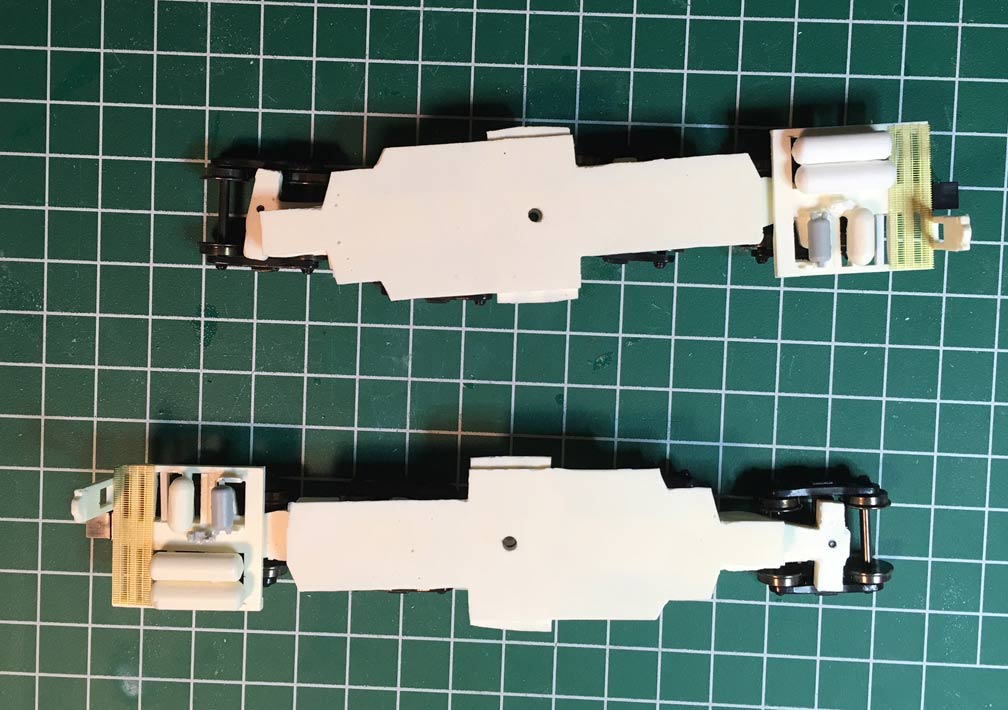
In the first photo, the two sets of rails are for the
overhead crane and the single track is for the loaded
Schnabel and flat cars. The barge slip will be where tape
measure is sitting. The second photo shows after the cutting
and routing for the tracks. All of the routed out areas will
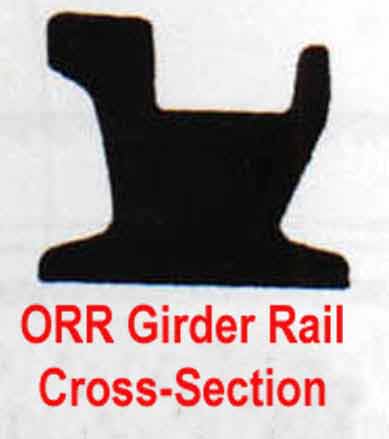
use girder rails instead of normal track.
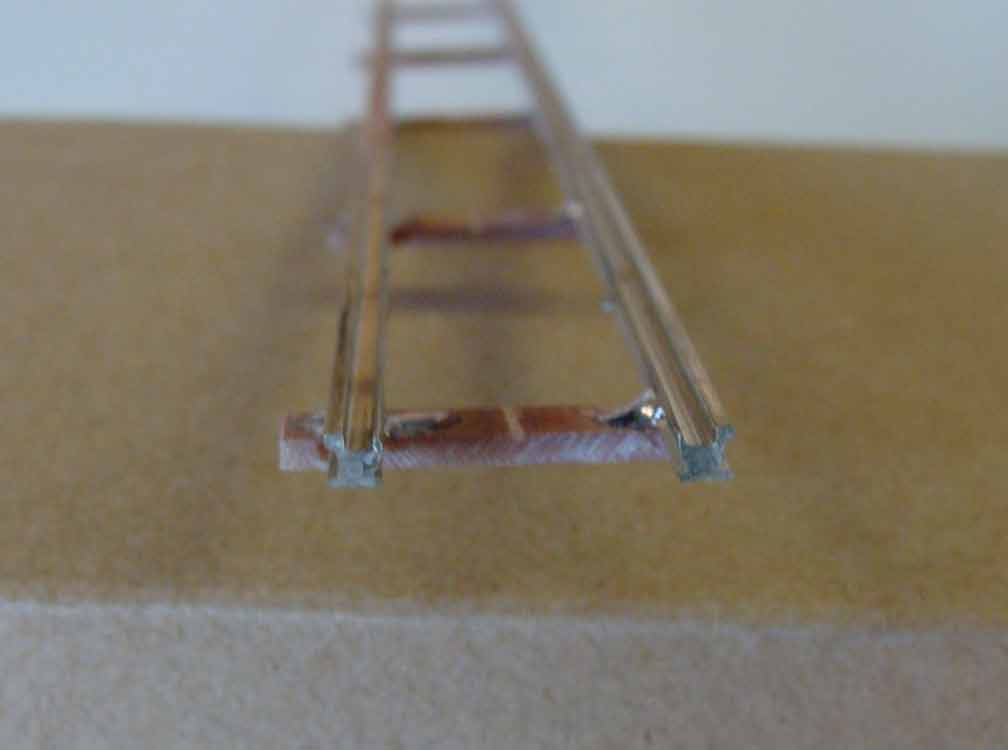
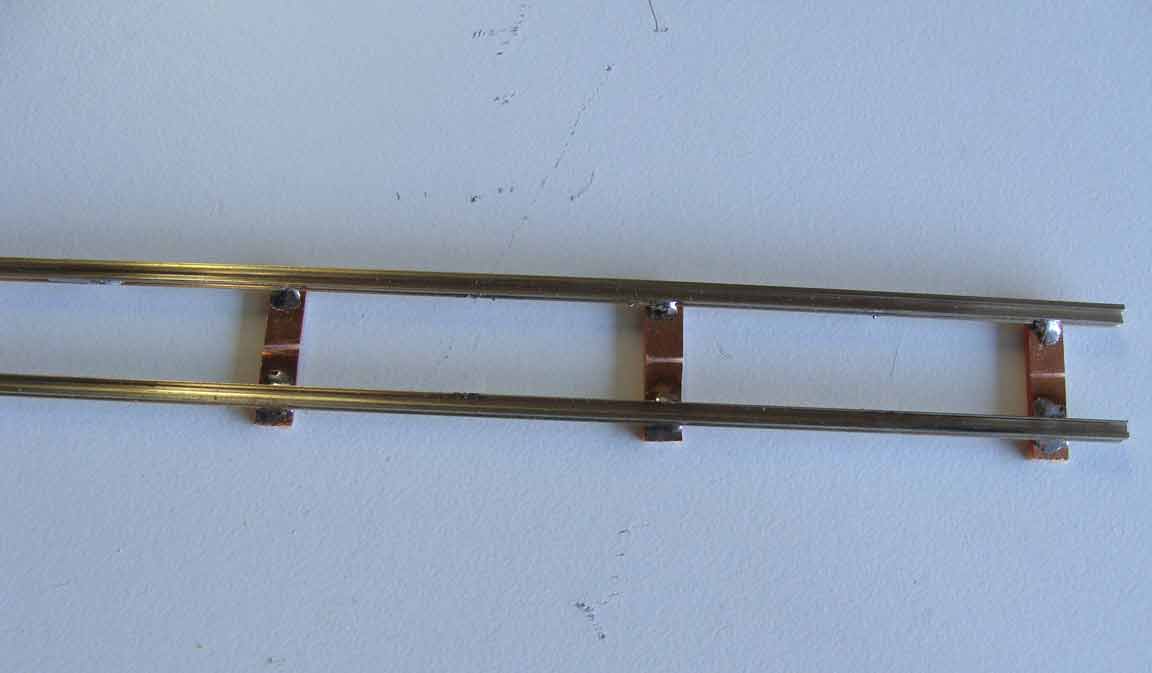
June - Soldering Track
I completed my first segment of custom track. I am using girder rail for the track buried in the concrete. Girder rail is usually used on trolley layouts, where the track is in the street. Soldering the girder rail to the PCB ties is not as hard as I thought, but keeping the rails straight is hard.
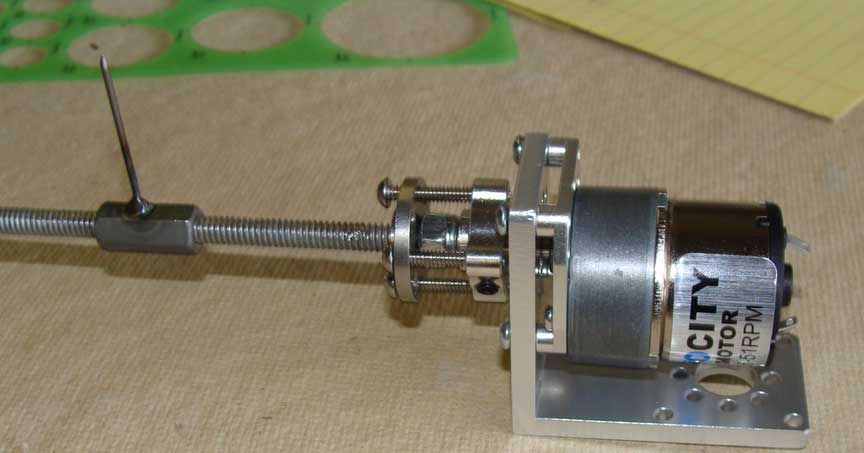
May - Linear motor
Never liked the wobble with the servo set up. Found a geared motor at Servocity, and the associated mounting hardware. This motor is geared to 51 RPM's, but will be able to vary the speed with DCC.